DIY Smart Home Dashboard
If you’ve seen my video on Why Smart Homes Are Dumb, you’ll know one of my goals with this house is to make it genuinely smart — not just “controlled by phone.”
It’s one thing to have a home that drives itself, and another thing entirely to have a house where you constantly pull out your phone to do basic things.
That’s where this little project comes in.
Why I Needed a Display
Most of our automations work great. For example, the blinds in our living room open when we first walk in each morning and close automatically at sunset in the cooler months.
But sometimes I just need a manual override. Like when the dog needs to go outside at night, or I want to grab the washing before bed. Right now, that means pulling out my phone, opening the Home Assistant dashboard, and tapping a button.
It works, but it breaks my key rules for the house - nothing should require a phone to do.
Hardware
I didn’t want a clunky Android tablet glued to the wall, so I built my own solution with a Raspberry Pi 5 (8GB) and the Raspberry Pi Display 2. (the 7 Inch version, the 5 inch launched just after I did this project)
The Display 2 is a nice upgrade — 720p resolution on a 7" panel looks crisp enough at arm’s length. The Pi screws neatly onto the back with a ribbon cable and power. For reliability, I added a PoE module, so the whole thing runs from one cable.
I also added the active cooling module to help manage heat. I don’t think this is entirely necessary, the Pi doesn’t really work very hard running this software, so you could save a little money here.
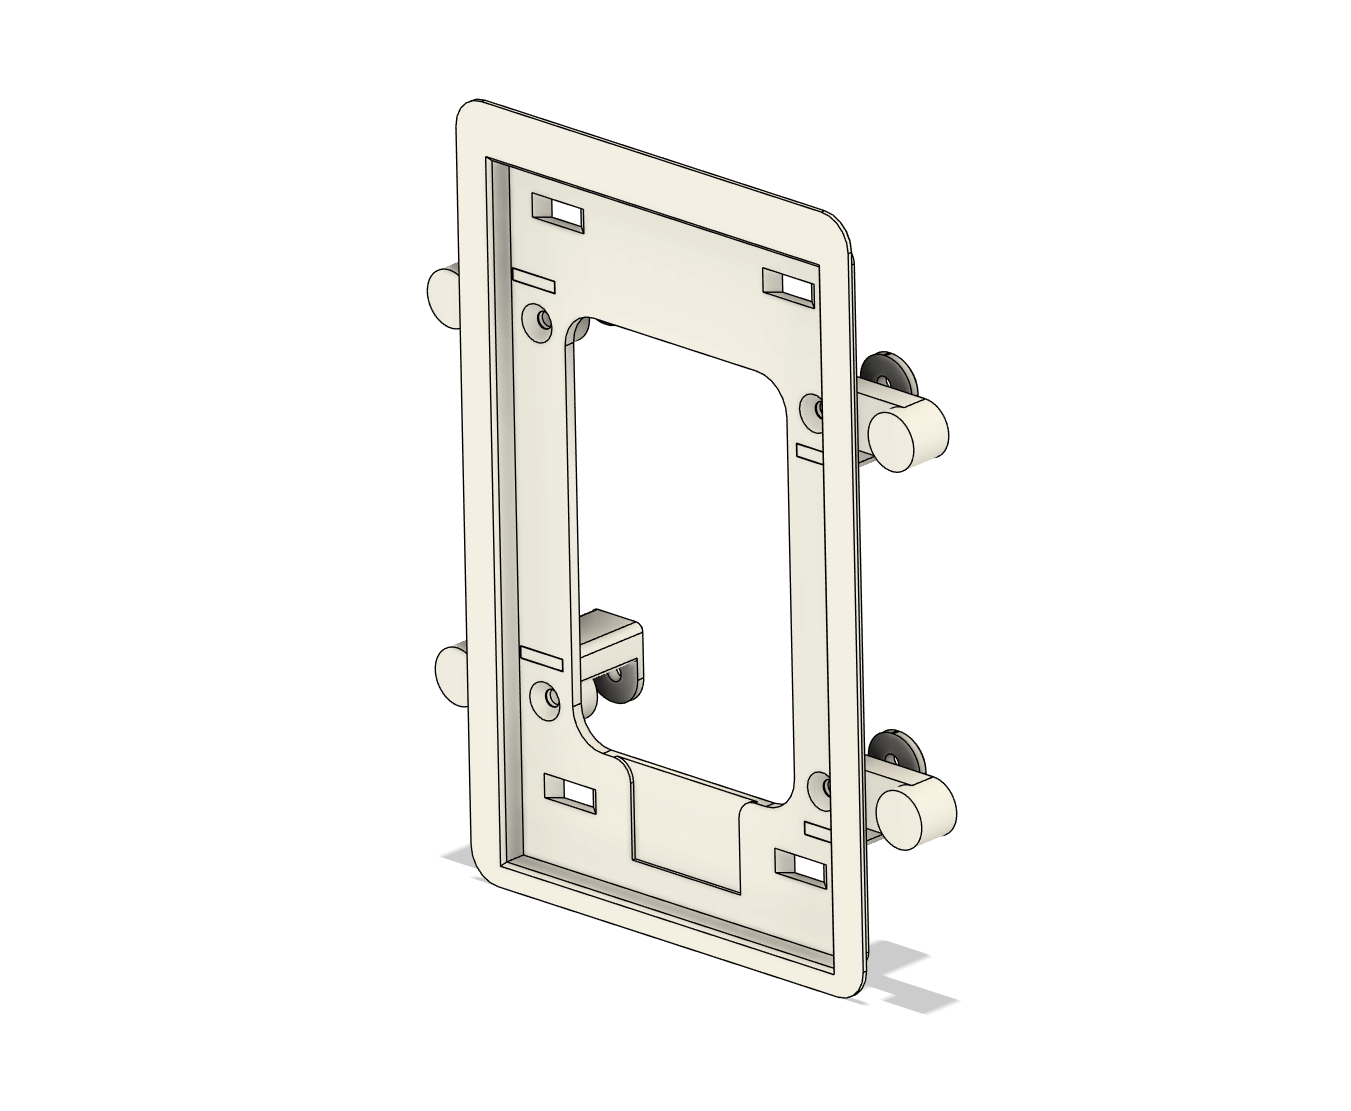
Mounting the Display
The fun part was designing a way to mount it flush with the wall.
Version 1: A cam-lock system (like my wall speakers) that held the display firmly. It worked, but the bezel stuck out more than I liked.
Version 2: A tapered “plug” that sat inside plasterboard. Neater, but hard to get right, and risky if I cut the hole too big.
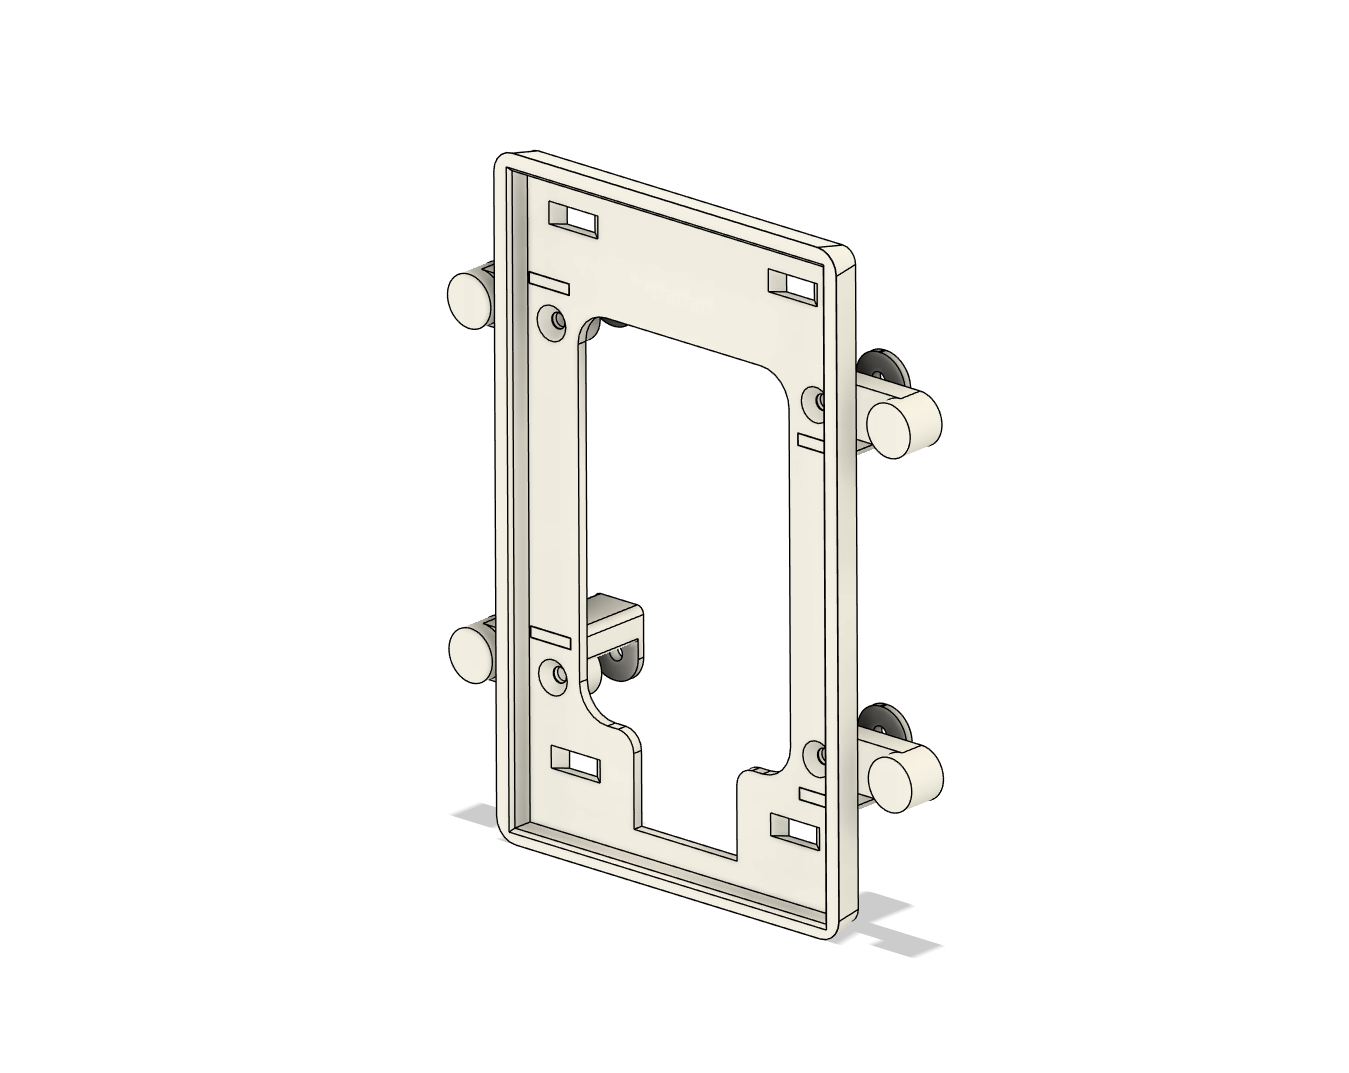
Version 3 (final): A simple flange behind the plasterboard, held by screws through the front. This meant I could fill and paint over the screw heads, leaving only the glass bezel visible. Strong magnets hold the screen securely in place.

Software
For the interface, I used TouchKio, a little open-source package that makes it easy to run Home Assistant dashboards full-screen on a Raspberry Pi.
Setup was straightforward:
Flash PiOS to an SD card.
Install TouchKio.
Connect to my MQTT broker.
Build a custom dashboard in Home Assistant.
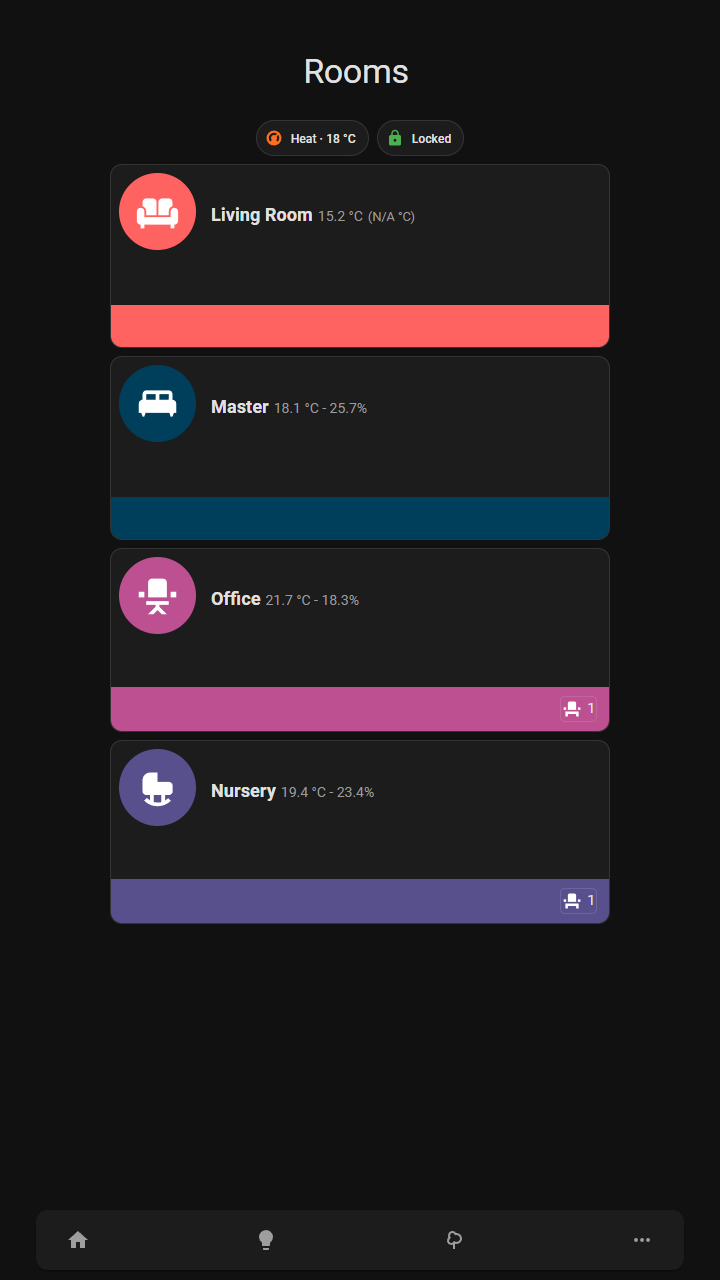
The dashboard has gone through many iterations already, and will likely keep going, but here’s some of the pages as they stand now.
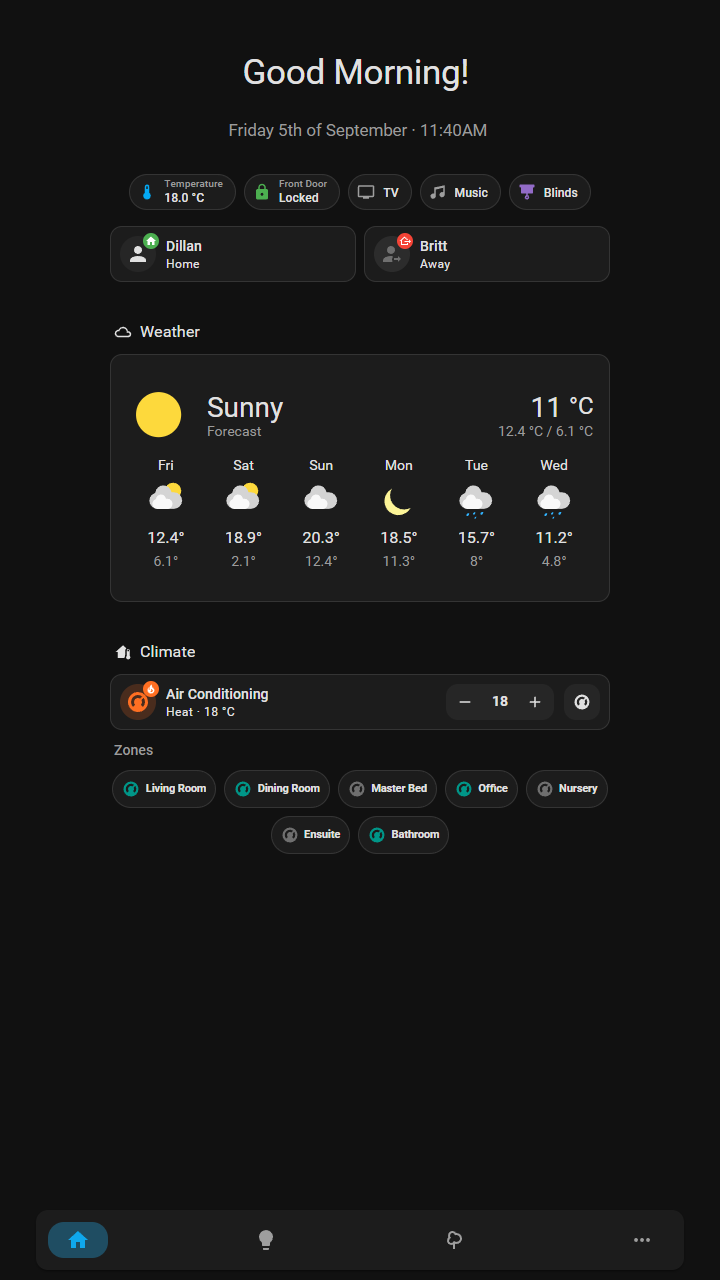


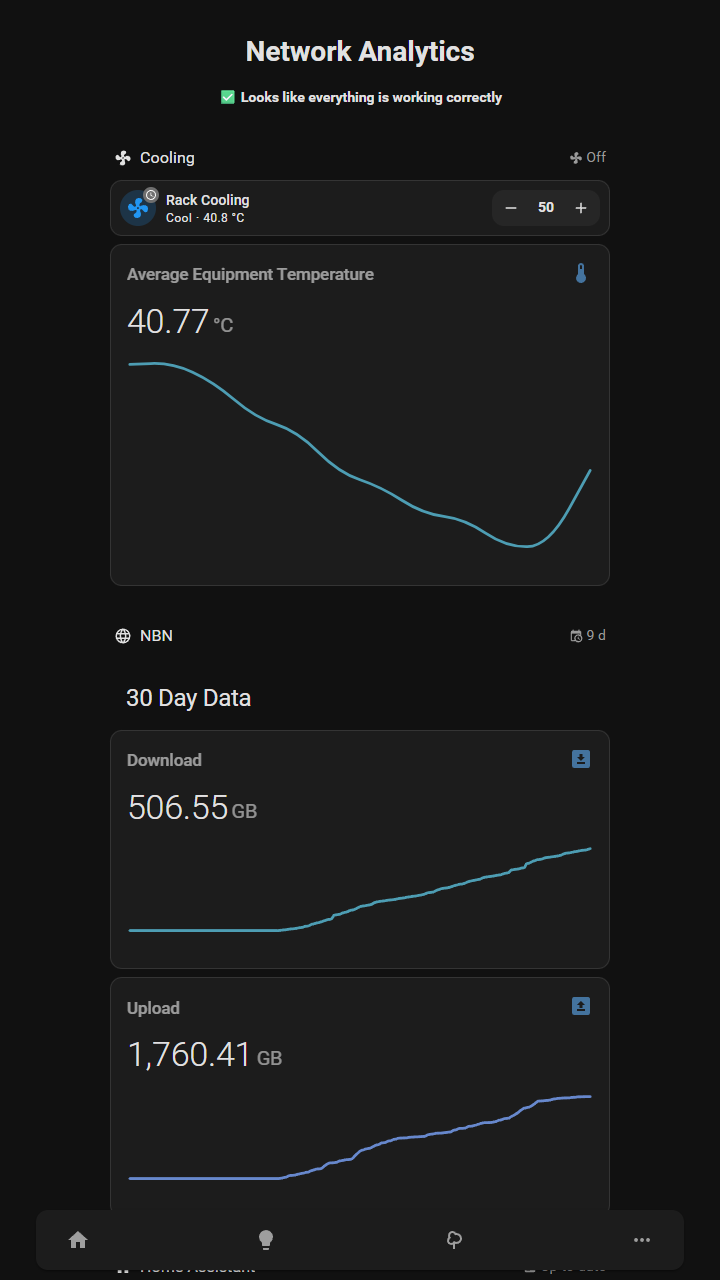

It’s snappy, looks clean, and avoids phone fiddling.
The Result
The display sits flush against the wall, powered by PoE, and looks like it was always meant to be there. It’s small, unobtrusive, and genuinely useful.

There are drawbacks (resolution isn’t amazing, bezel is a bit chunky), but it’s easily better than most off-the-shelf options, and infinitely more fun to build.

And since it’s just a Raspberry Pi, it could do even more:
Run Home Assistant directly.
Host a Zigbee/Z-Wave coordinator.
Use it as a voice assistant / satellite
Links to Products & Software
Here’s everything I used:
Final Thoughts
This was one of those projects where the journey was just as satisfying as the destination.
The end result feels polished and integrates perfectly with my smart home — but more importantly, it means I can finally interact with the house without digging my phone out of my pocket.
Would you put one of these in your home?
