3D Printed Magnetic Cable Management
LTT’s Magnetic Cable Management
Linus Tech Tips released their Magnetic Cable Management (MCM) system a while back. It’s a set of small clips and other accessories designed to keep cables tidy on desks, walls, and racks. Each clip holds a cable, and magnets on the base allow it to stick to steel surfaces or magnetic pads.
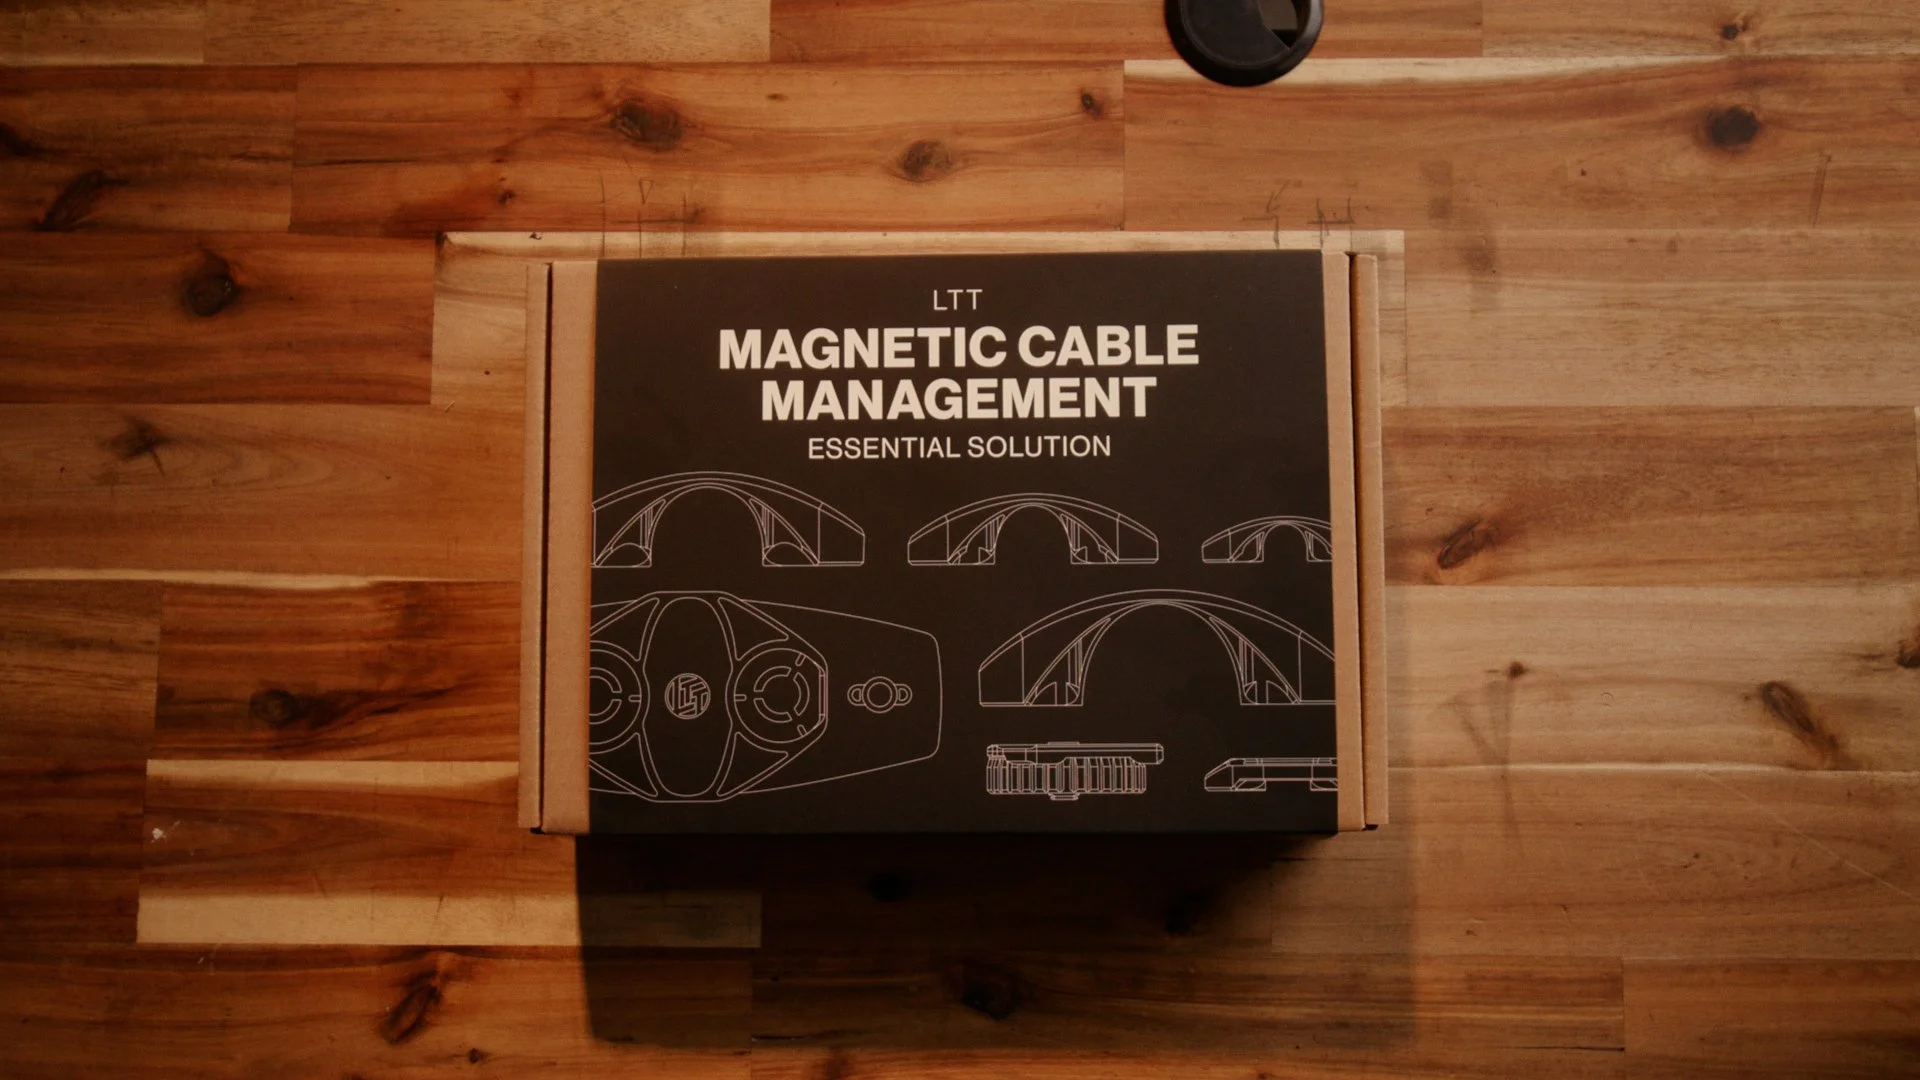
LTT’s cable management system
The system is well designed and clearly the result of a lot of iteration. The clips are modular, the magnets are strong, and there are different clip styles for different cable sizes.
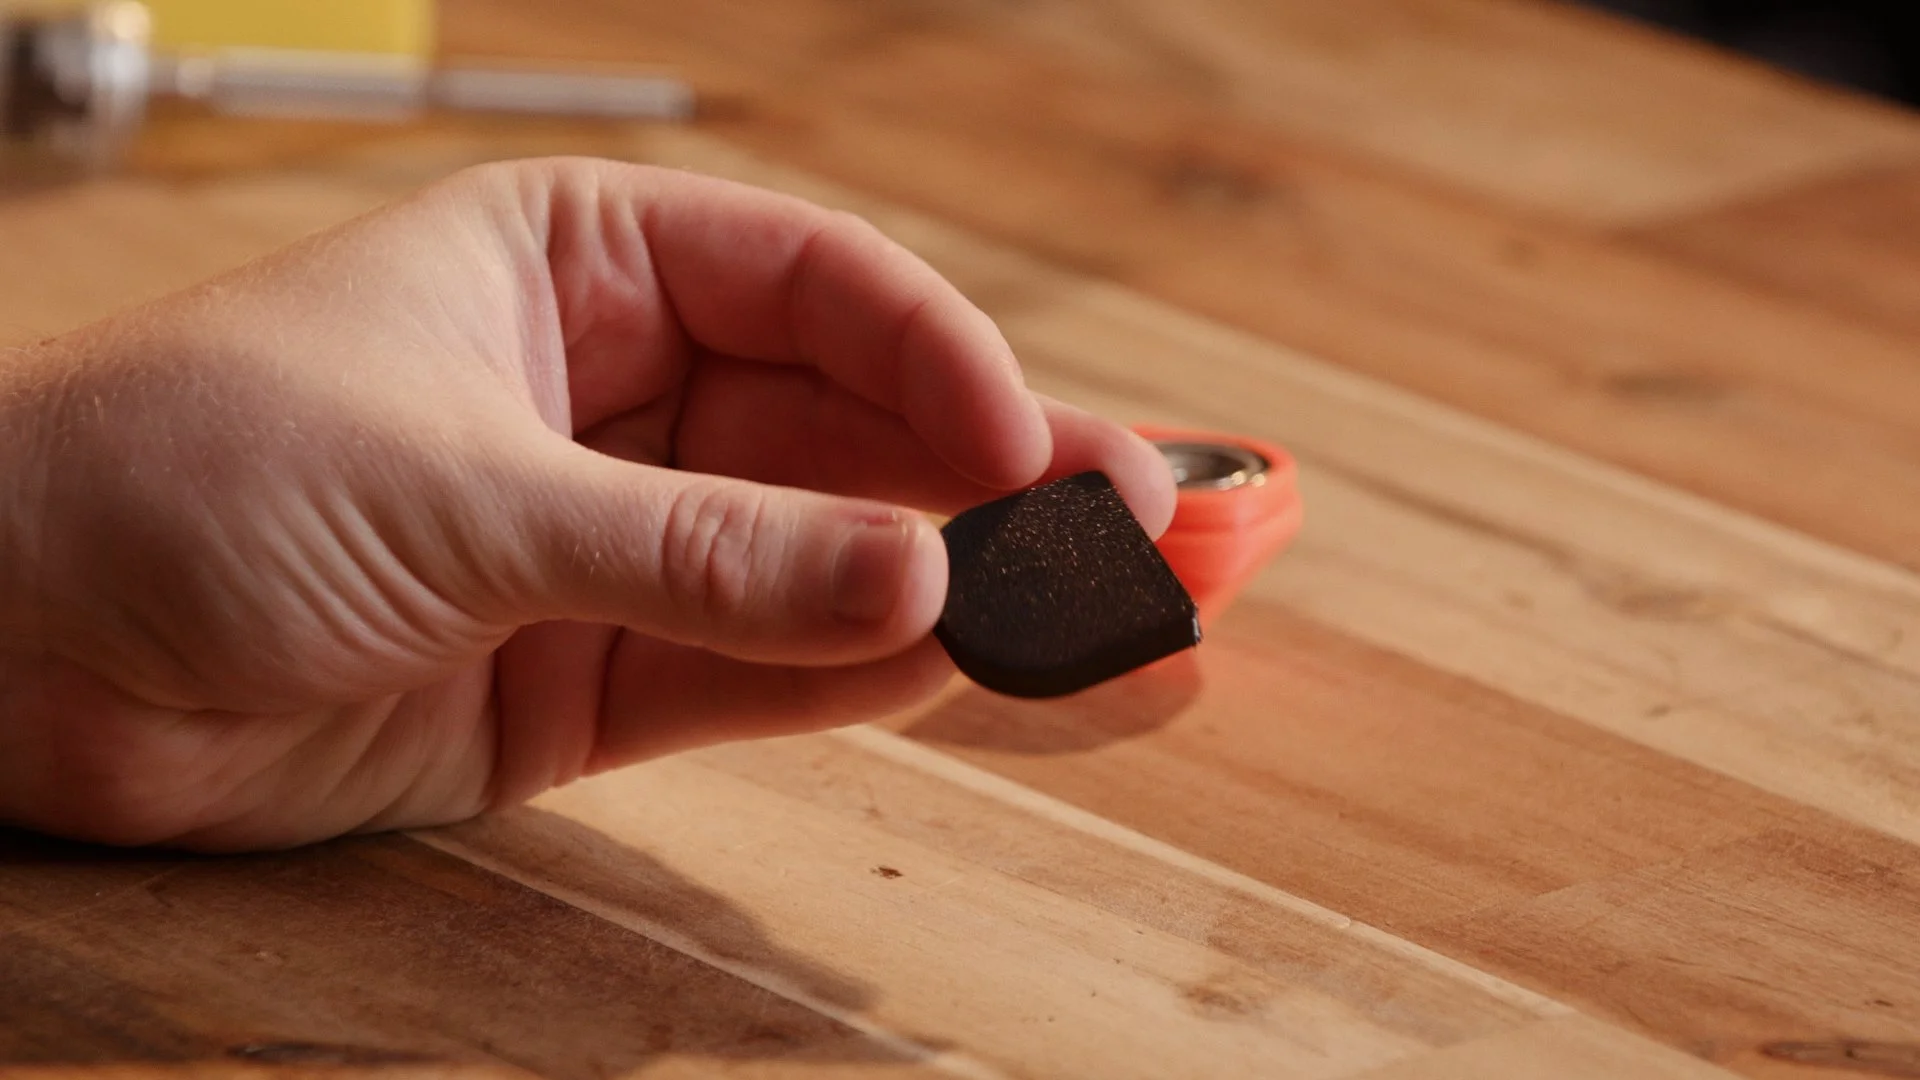
One thing that caught my attention though was the magnet arrangement on the base of the clips. Instead of a single magnet, they use two concentric metallic rings. This led me to believe they were just a pot magnet, but taking it apart revealed they’re a little different.
Modern magnet design can get quite sophisticated. Techniques like pot magnets or Halbach arrays can redirect magnetic flux to increase holding force in a particular direction. Seeing those two rings made me wonder if something similar was happening here.
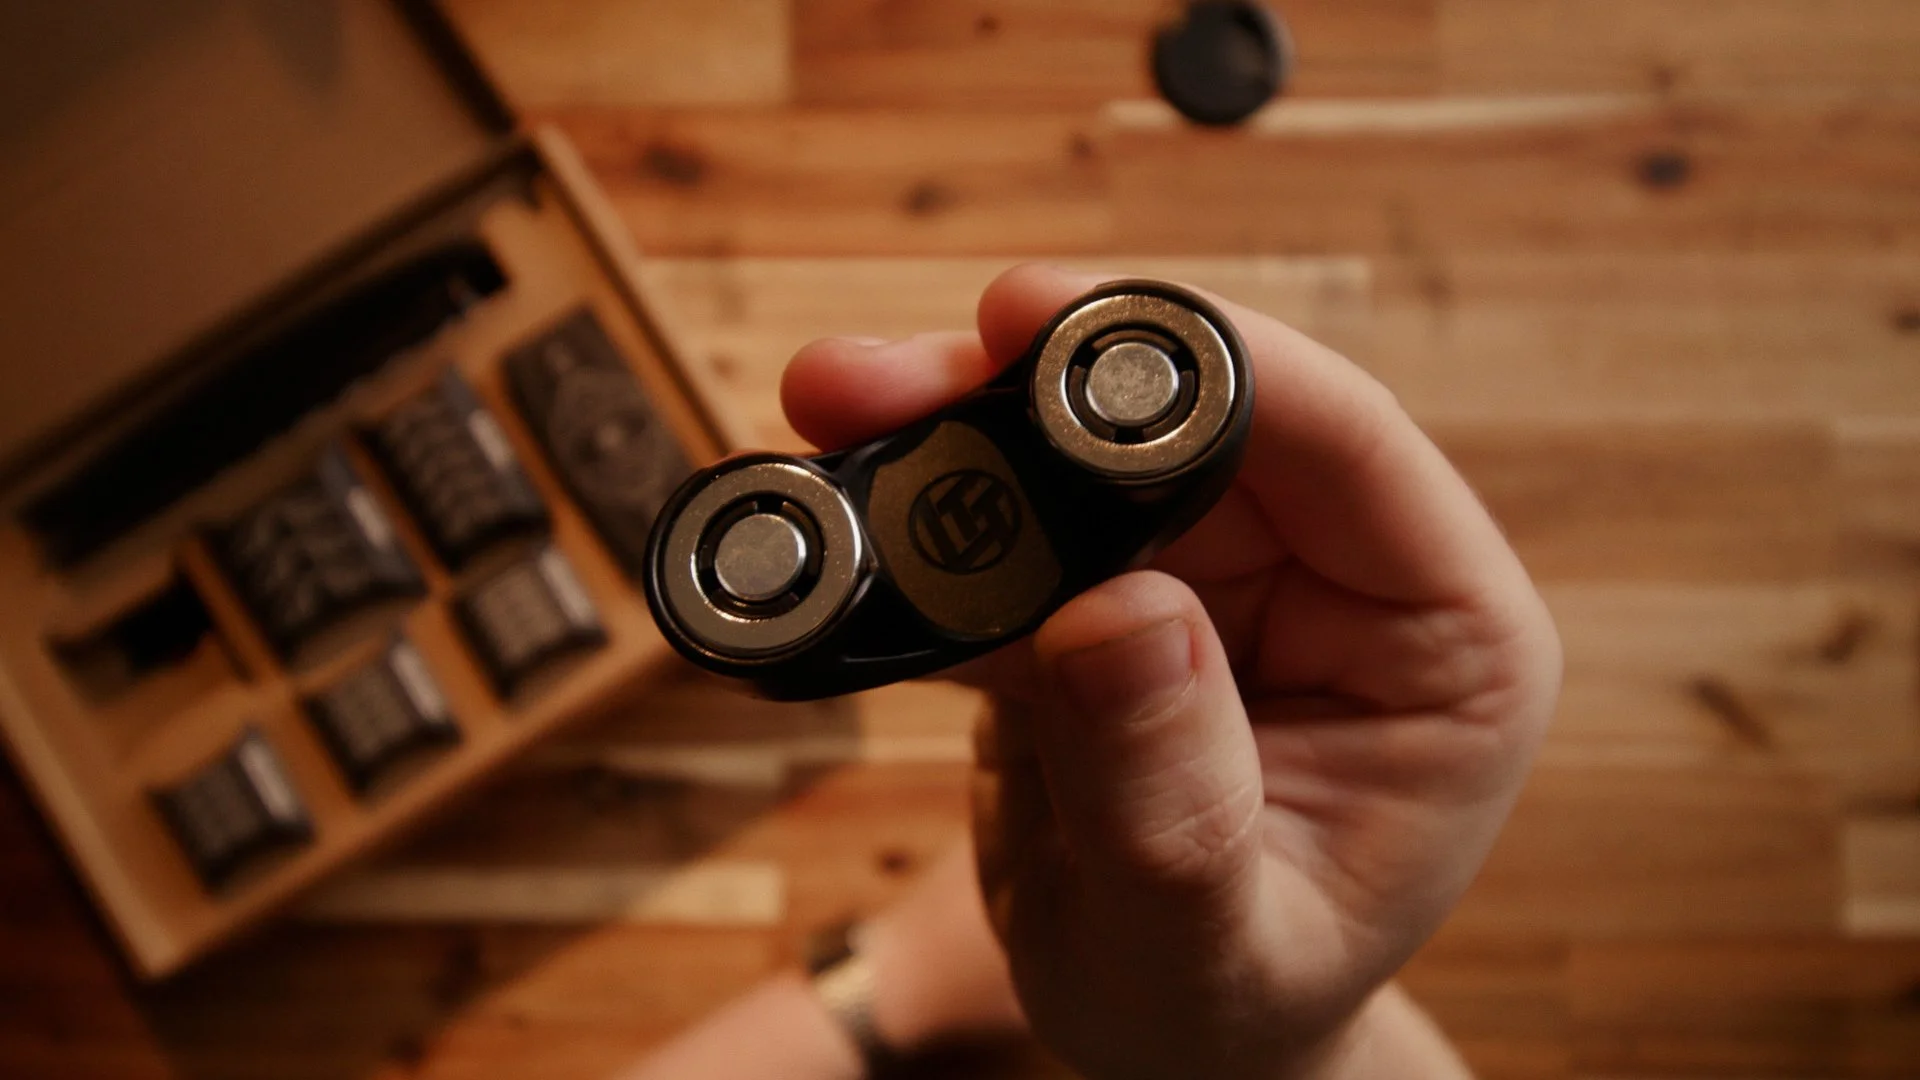
The concentric magnets I thought would be a pot magnet
It turns out, the inner circle is a metal slug, and the outer ring is a neodymium magnet, essentially the opposite of the pot magnet arrangement I’d assumed these were.
A quick bit of experimentation revealed they were working similarly to how a pot magnet works. No clue exactly how that works, but there’s clearly been some work put into the design.
The Curse of 3D Printing (and Some Design Skill)
Owning a 3D printer comes with a bit of a curse.
Once you’ve spent enough time designing parts, it becomes very difficult to look at a product like this without immediately thinking:
“I could probably make that.”
You start noticing small details. How it’s assembled. How the parts fit together. Whether it could be simplified or modified.
Sometimes that’s useful, like when a product isn’t quite exactly what you needed, or when there’s an obvious improvement to be made.
Other times it just means you end up spending an afternoon designing something that you probably could have just bought.
This project was definitely the latter.
After taking a look at the magnet arrangement and understanding roughly how the original system worked, I decided to try building my own version.
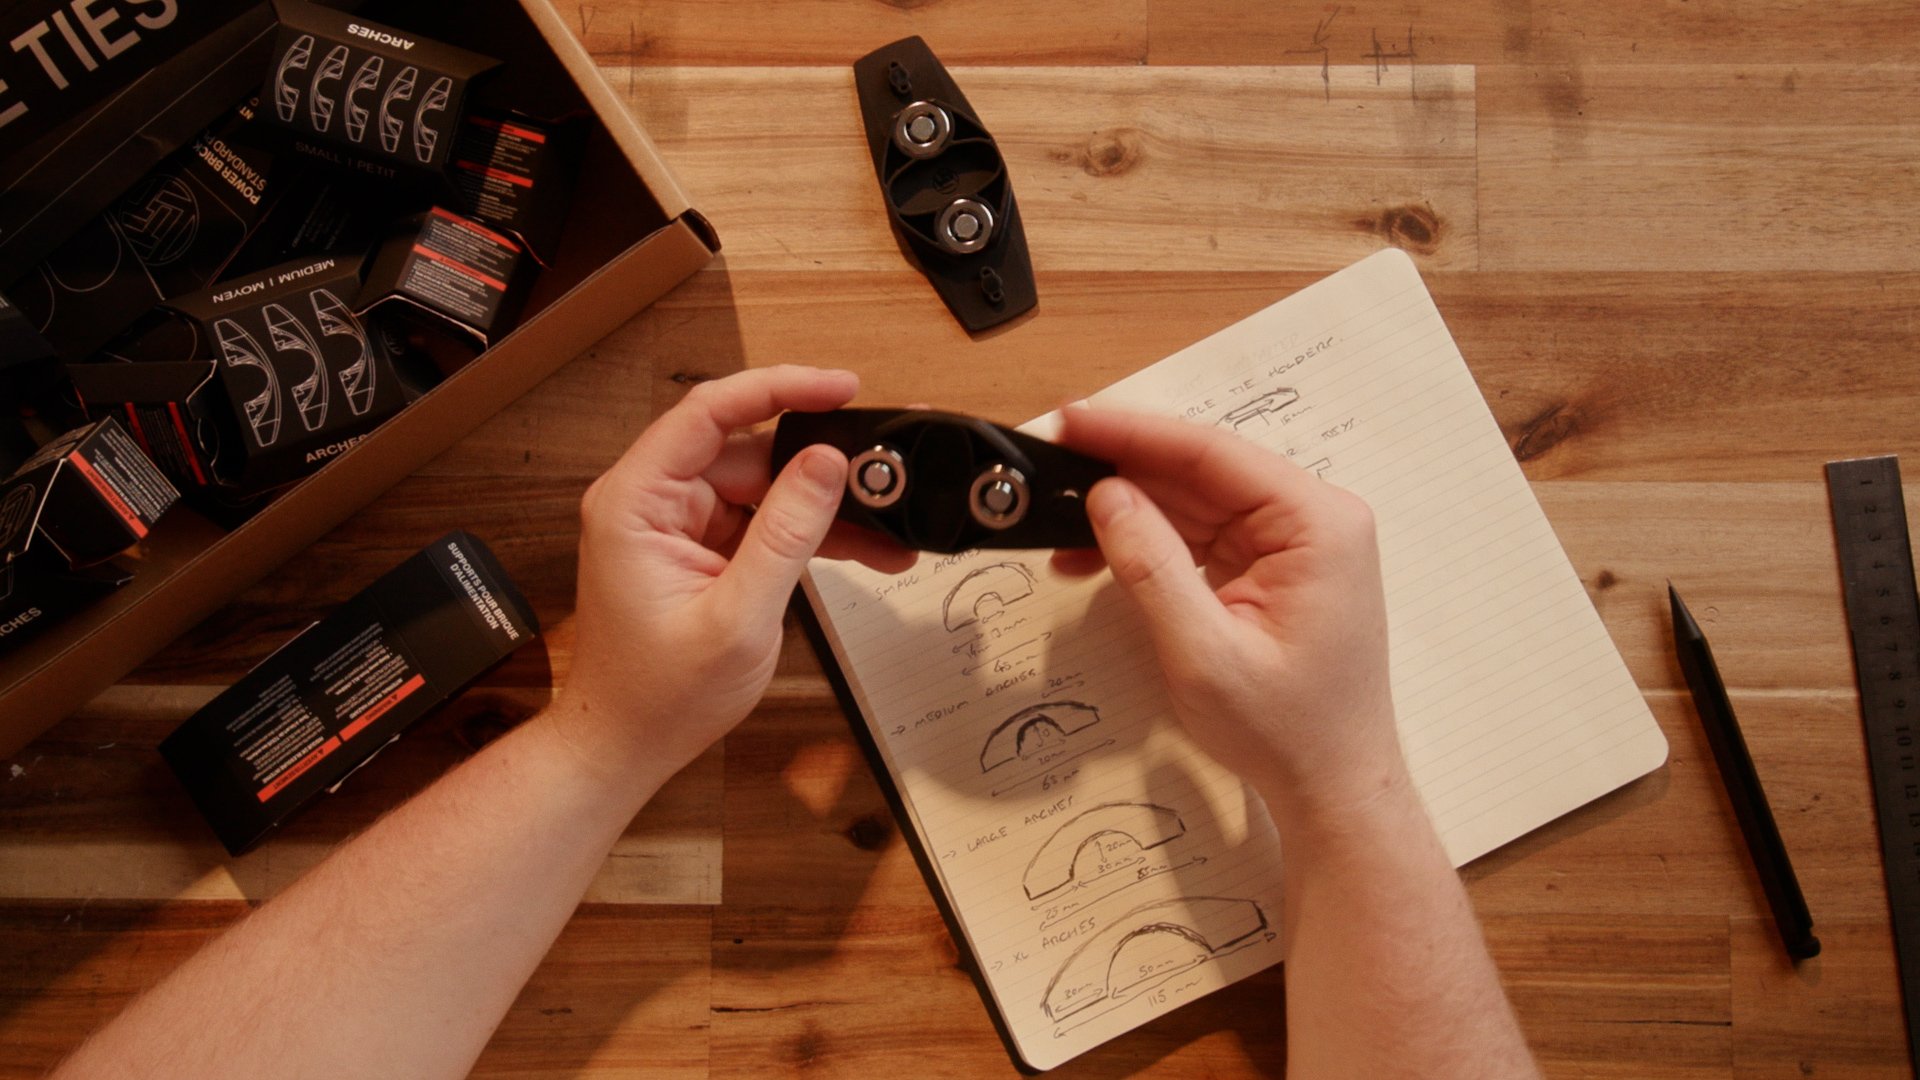
My versions
I thought I could make my own version of the LTT cable management system for much less, so I set about designing a 3D printed version of each of the accessories.
I started with the arches. These are functionally identical to the LTT ones, but are designed for printing. That means no extreme overhangs, and minimal bridging, like the rest of my versions.

My version of their cable arches
It does give them all a bit of a chunky 80’s vision of the future look, but I like that anyway!
Once I was happy with my arches, I set about designing a version of the cable tie holders, power brick holders and the power strip mounts, all of which share similar features to the arches.
The power brick holder and cable tie holders were pretty straight forward, but the power strip / bar / board holder was a little more complex. It relies on a pot magnet with an M5 thread through the middle. A screw with the head turned down is fitted to the magnet, and is tightened down inside a keyhole by turning the magnet.
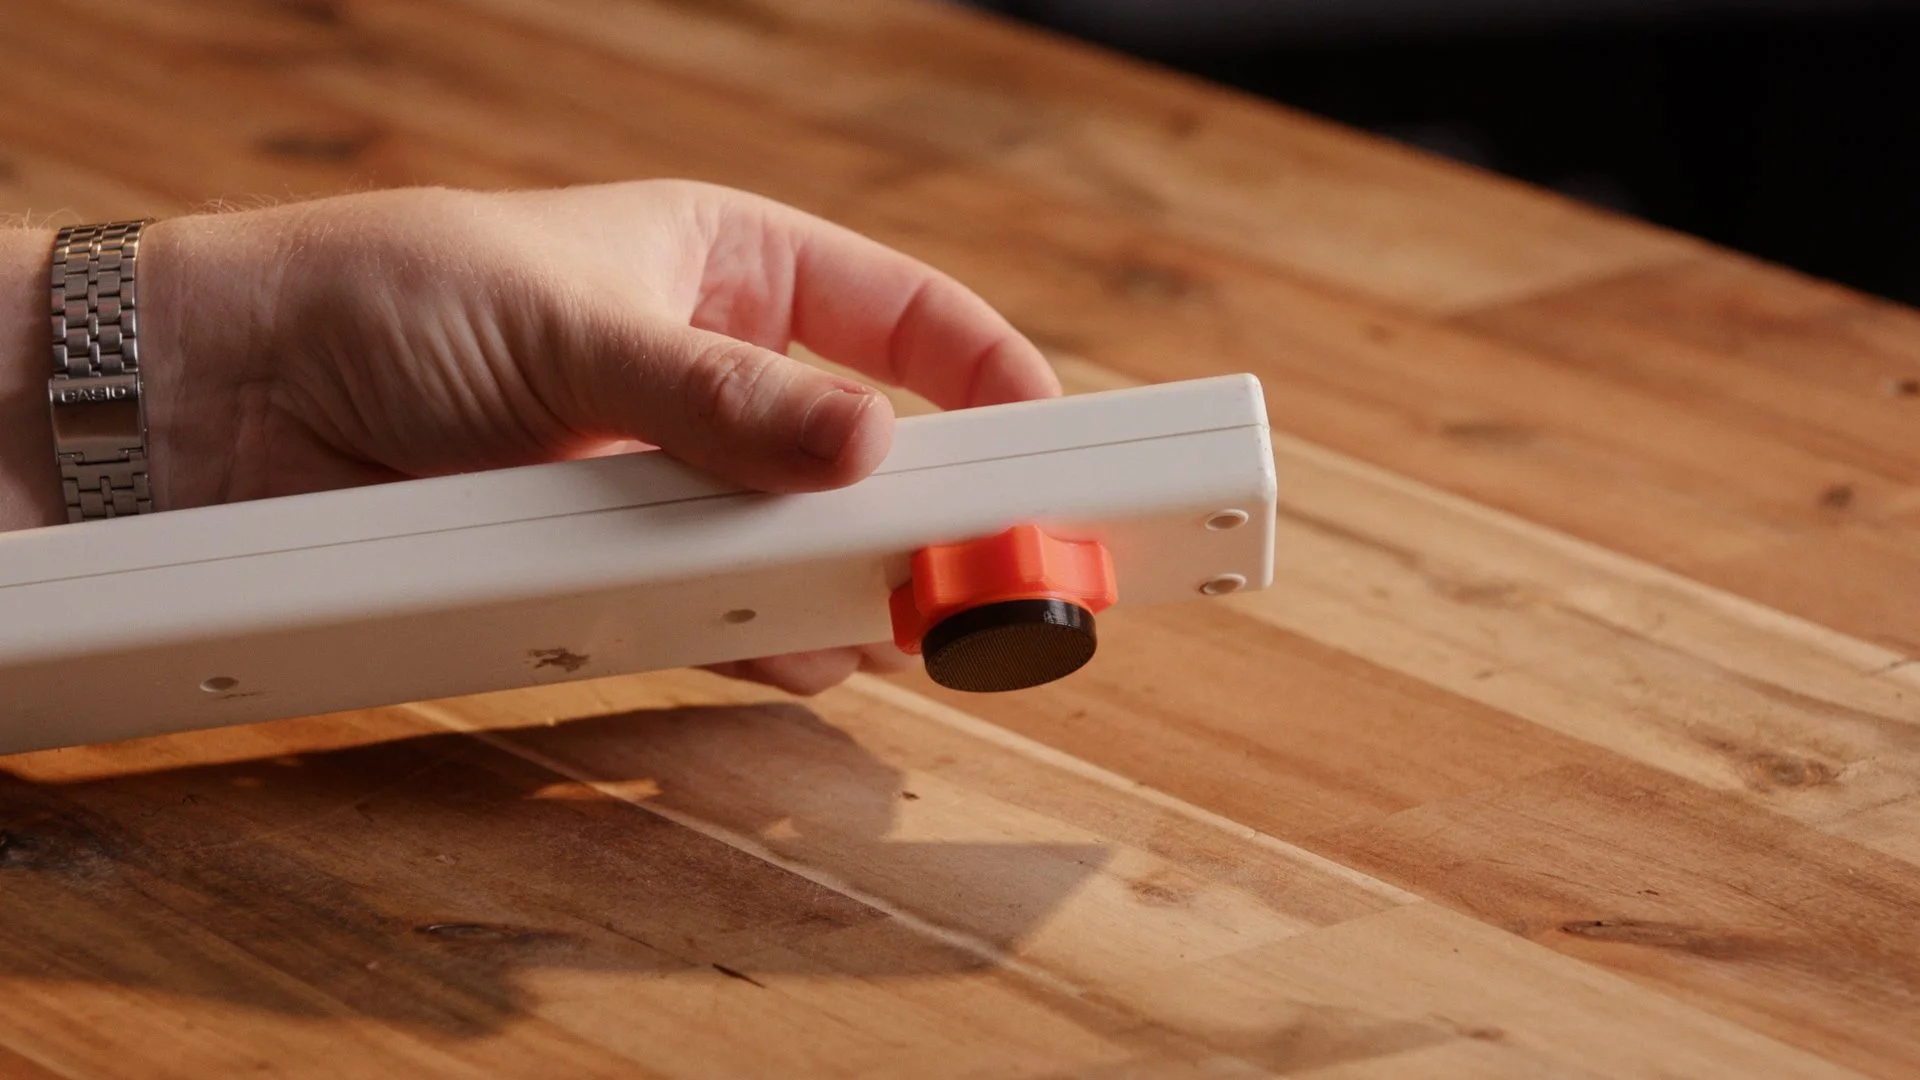
My power strip / bar / board holder
The one improvement I did make to the LTT design is integrating the non-slip surface accessory into the design itself.
I made little caps for all my accessories that can be printed from a flexible material like TPU, and clip over the magnets themselves. This provides you all the advantages of the non-slip pads offered by LTT with none of the disadvantages!
The non slip magnet covers
If you want your accessories to have a little more magnetic pull, at the risk of scratching or slipping, you can use the accent ring instead to expose the magnet.
There are also versions without the magnet covers or accent rings at all if you want to keep it simple.
The models are all parametric, which means the key dimensions can be easily adjusted without redesigning the part from scratch. If you want the arches to suit thicker cables, different magnets, or a slightly different spacing, you can just change a few parameters and regenerate the model. It makes it much easier to adapt the design for different setups or materials.
Comparison
My original goal was to make my version more affordable than the original. Unfortunately, I didn’t quite achieve that. However, I did manage to accomplish the rest of my goals, including making a small improvement to the design with integrated magnet covers.
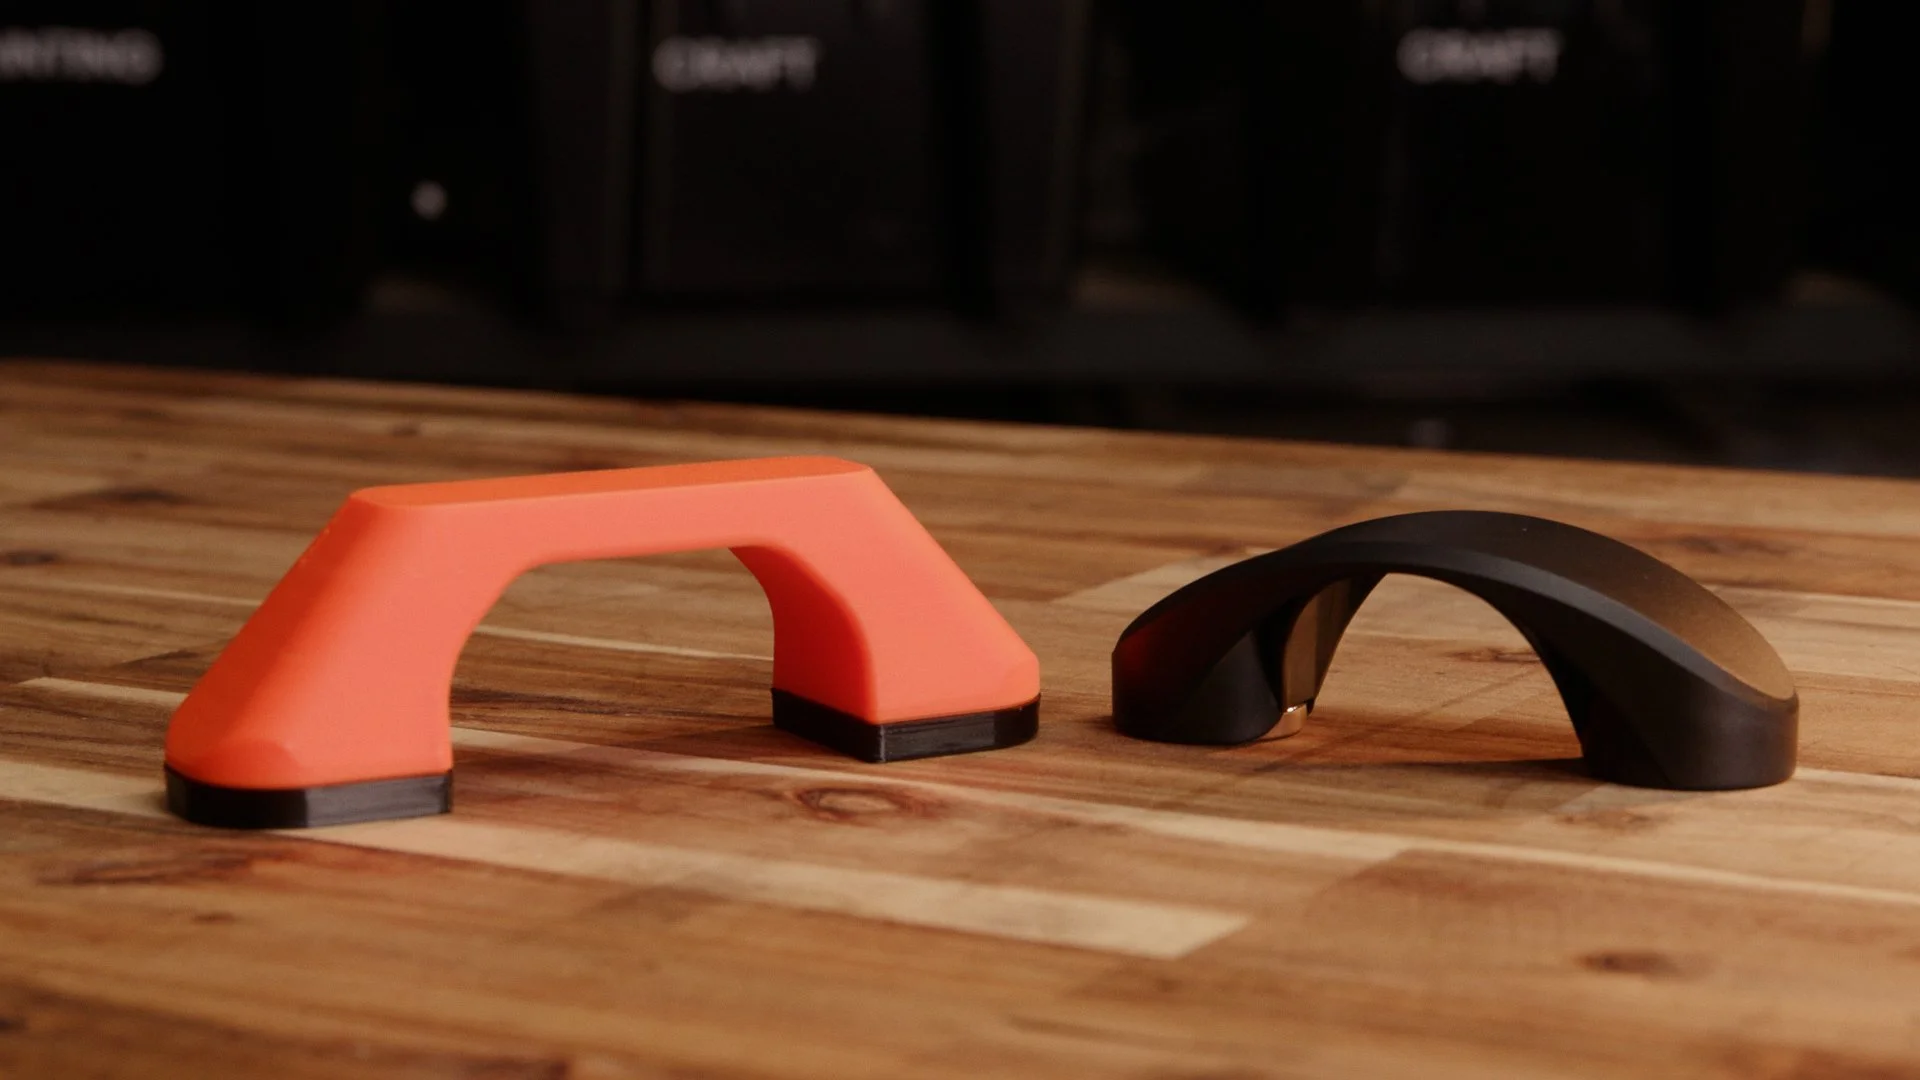
My XL arch vs the LTT version
The cost issue is probably down to my choice of magnets. With some cheaper options — maybe sourced from somewhere like AliExpress — you could likely build these for significantly less than they ended up costing me.
The original LTT clips definitely benefit from injection moulding and large-scale manufacturing. The parts are compact, clean, and very polished.
The 3D printed version, unsurprisingly, is a little less sleek.
Functionally though, the concept works really well. The magnets hold firmly, the clips keep cables organised, and the design can easily be modified or customised.
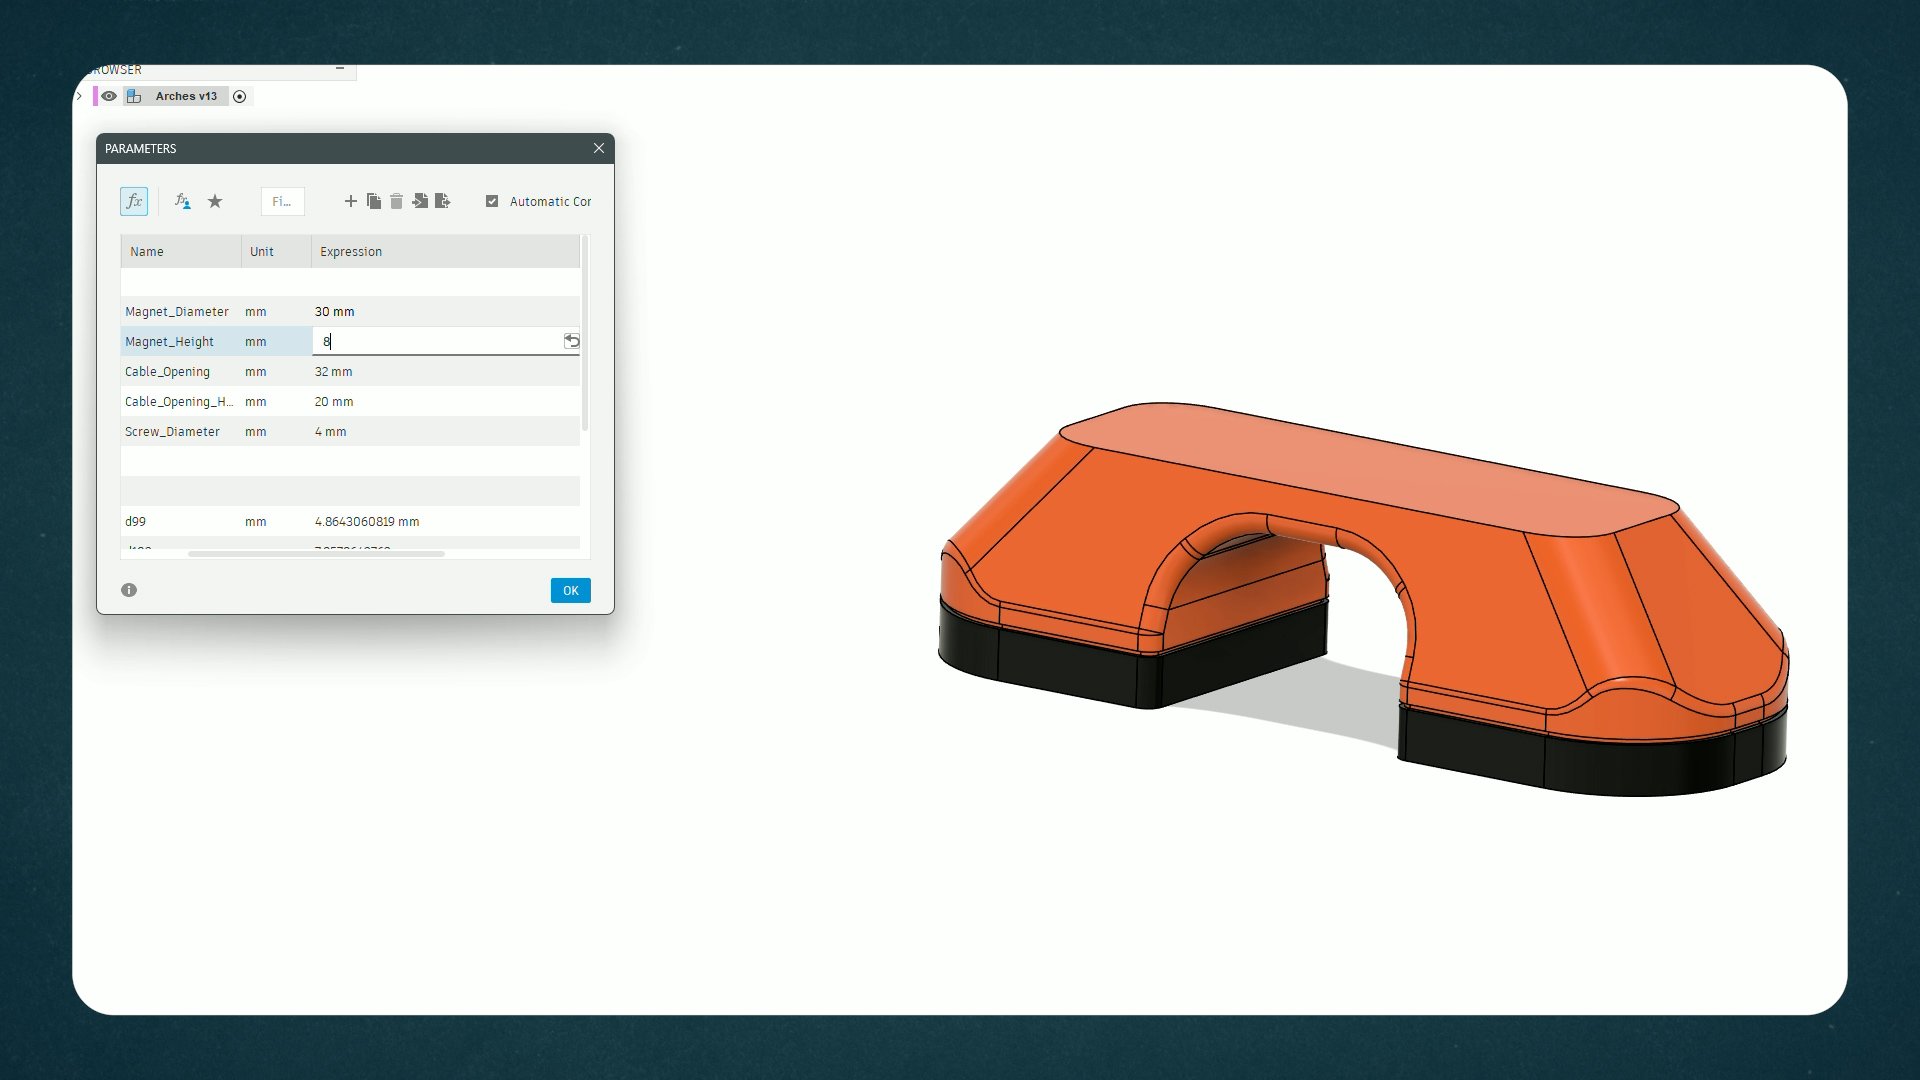
Adjusting the arch dimensions using the parameters window in Fusion
That’s really the main advantage of making something like this yourself. Instead of being locked into one configuration, the design can be tweaked, improved, or adapted to suit whatever cables or workspace you’re dealing with.
And if you already have a printer and a few magnets lying around, it’s a fun little project to experiment with.
Make Your Own!
These are incredibly easy to print, and are a fun little organisation project to tackle yourself.
All the files are available on Printables, you’ll also need a copy of Fusion (the free version is fine)