The Prusa Tower
The Problem
If you’ve spent any time 3D printing, you’d know that while they allow for rapid prototyping, when you’re working on a number of projects side by side, you spend a lot of time waiting for your printers. One solution for this is to get faster printers, but print speed has plateaued in the last couple of years as the industry has settled on Core XY motion systems, and the new limiting factor is the materials themselves.
The next solution is to get more printers, allowing work on more than one project at the same time and reducing turnaround time for multi-part prototypes which is exactly what I’ve done. (Thanks Prusa.)
As my print garden (not quite a print farm) now takes up more space than I have spare, I needed to improve on my old IKEA cart for my printers.
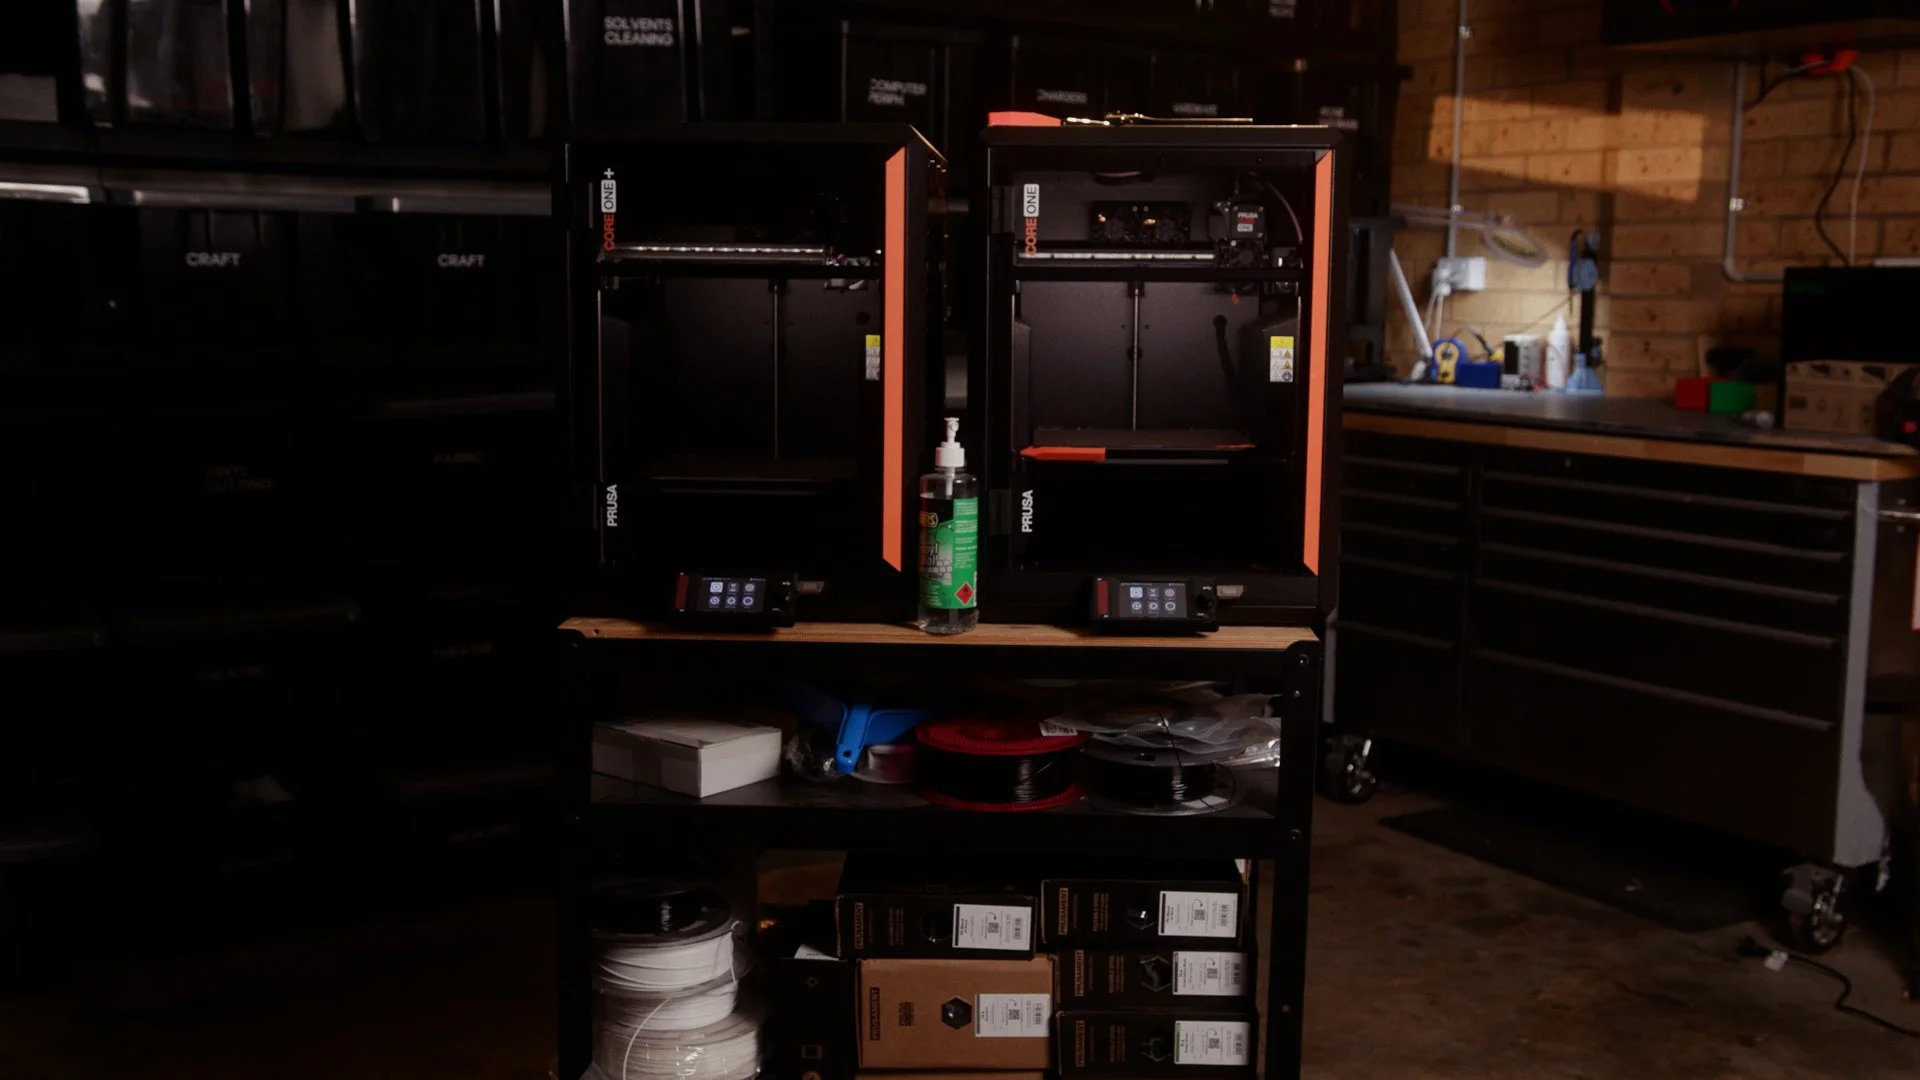
While this cart has served me very well, it’s barely got enough space for two Core Ones, and it doesn’t allow easy access to the spool holders on the side of the printers. We had a bit of an overwhelming reaction to our 3D printed Aqara sensor housings, and when I started considering a third Core One for a bit more production capacity, I realised I had nowhere to put it.
There were a couple of other problems too.
Modern Core XY printers move fast, and if multiple machines are sharing the same surface those vibrations can affect print quality, reliability, and long-term wear. My old trolley was never designed with that kind of motion in mind, and got a real wobble up when both printers are going.
So the goal was simple:
Fit three printers into a very small footprint
Improve access for filament changes
Reduce vibration between machines
Keep the whole thing modular and adjustable
My Solution
The space I wanted to use for the printers is only about 800mm wide, and with each Core One being roughly 400mm across, there was no way to place them side-by-side while still having access to the spool holders.
The answer was to go vertical.
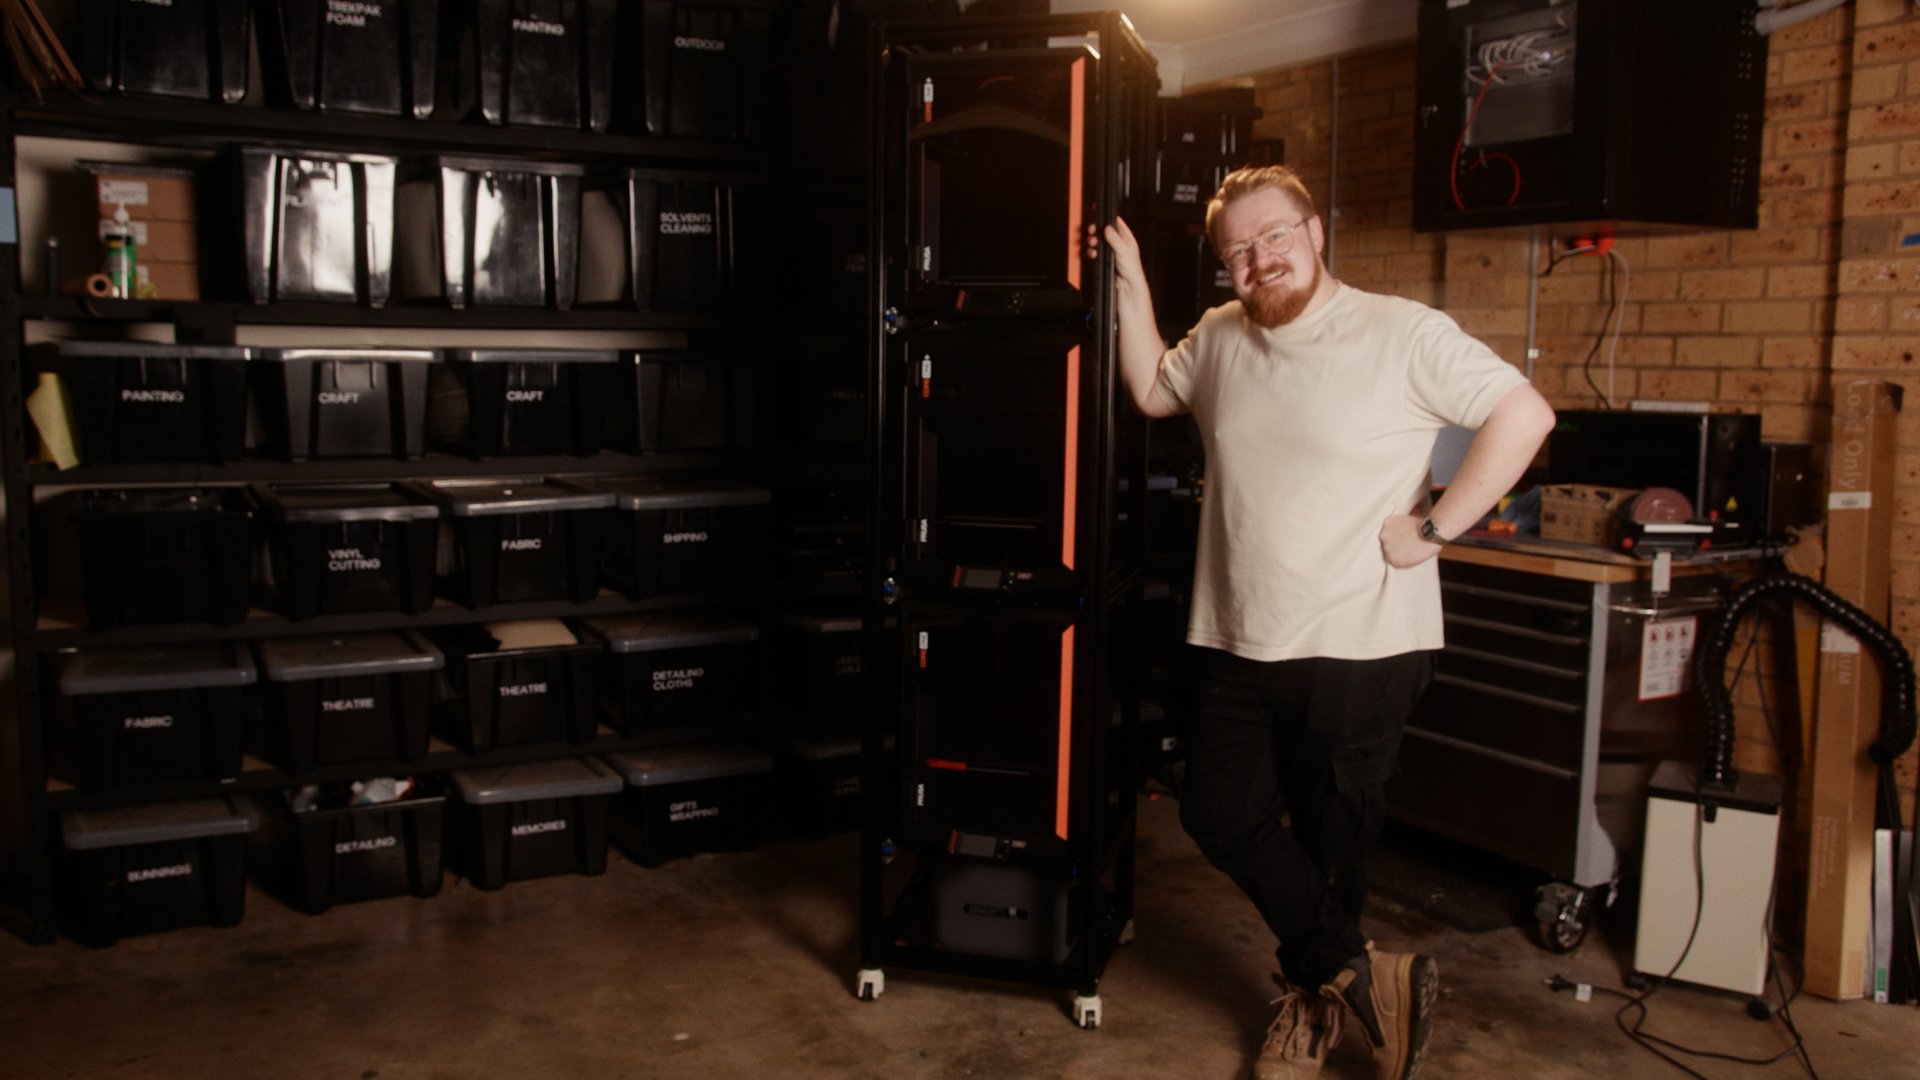
Instead of spreading printers across a workbench, I designed a three-tier printer tower, stacking the machines on top of each other.
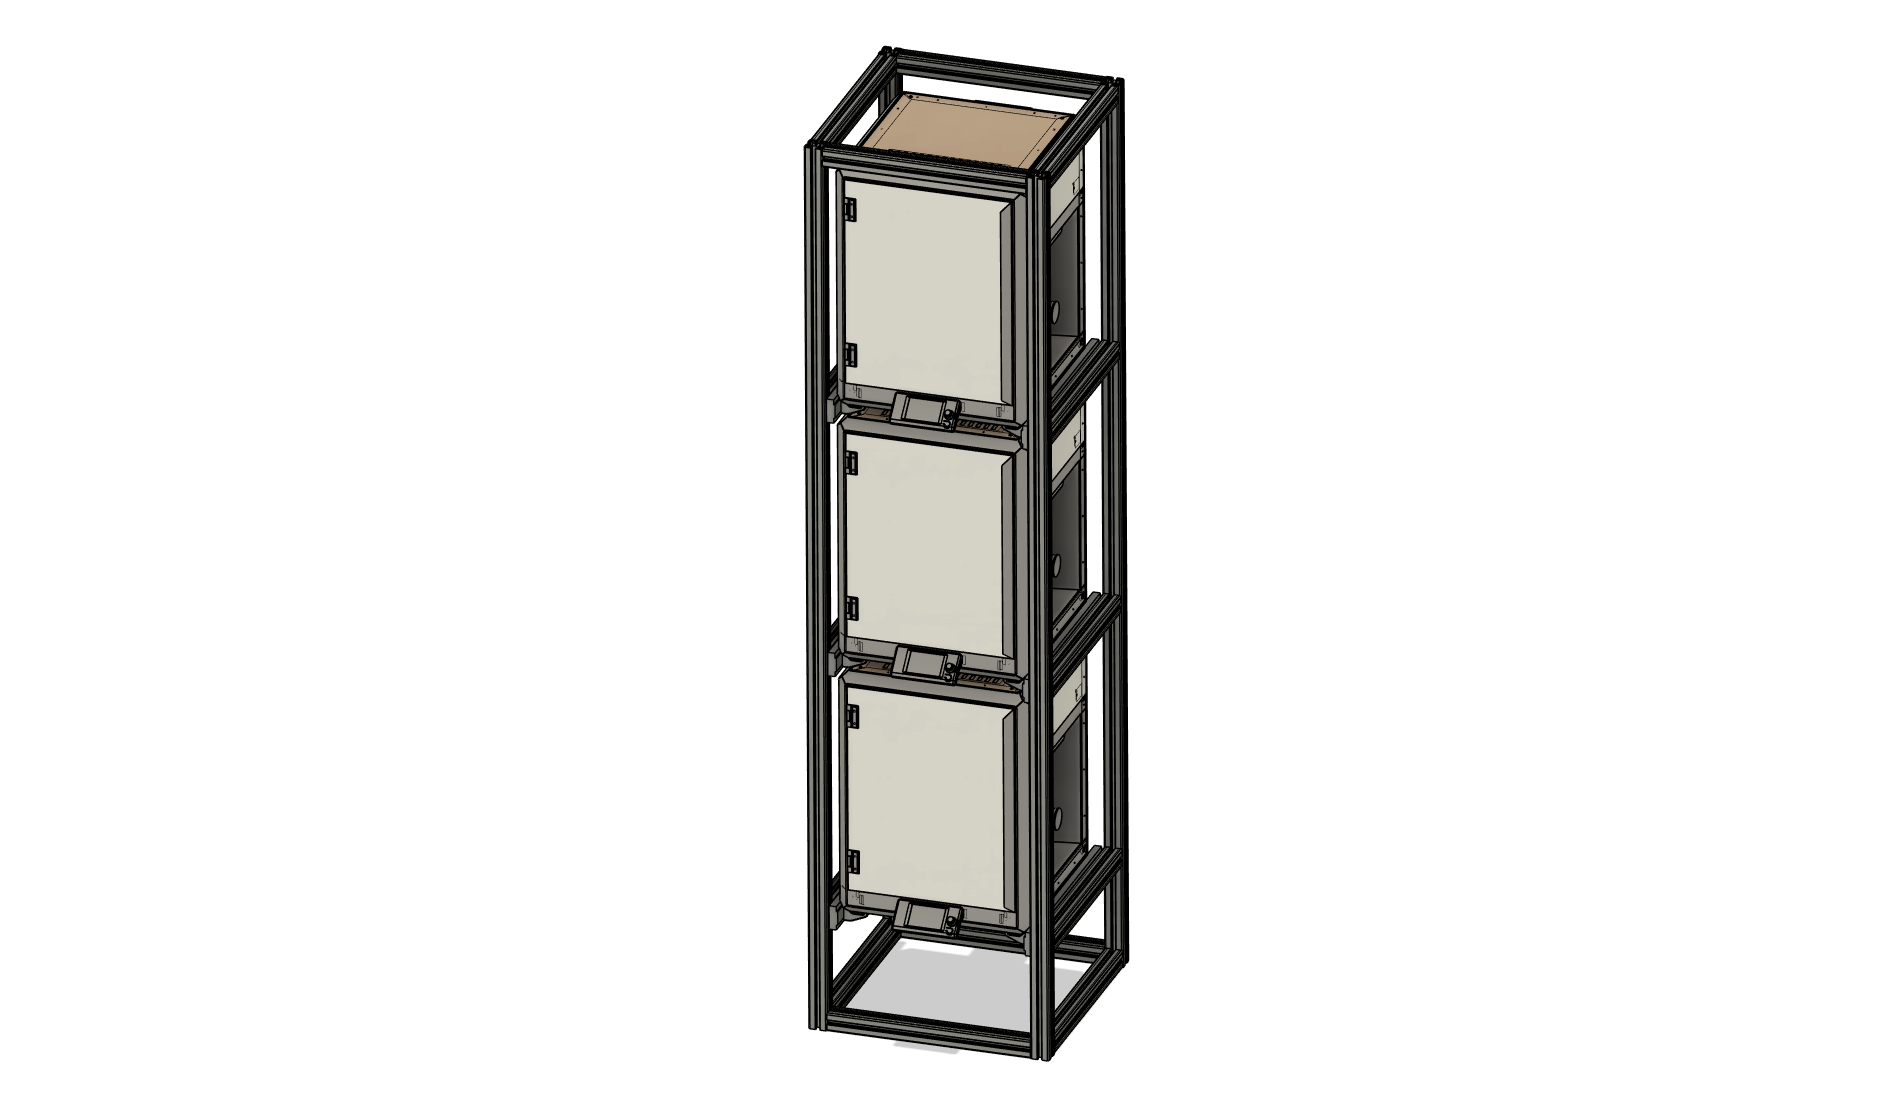
To build the structure I used 4040 aluminium T-slot extrusion. If you’ve ever worked with it, you’ll know why it’s so popular - it’s basically engineering Lego. With T-nuts and compatible brackets you can assemble strong frames quickly and reconfigure them later if your needs change.
The tower itself is a simple four-post frame, sized just large enough to hold the printers without wasting space.
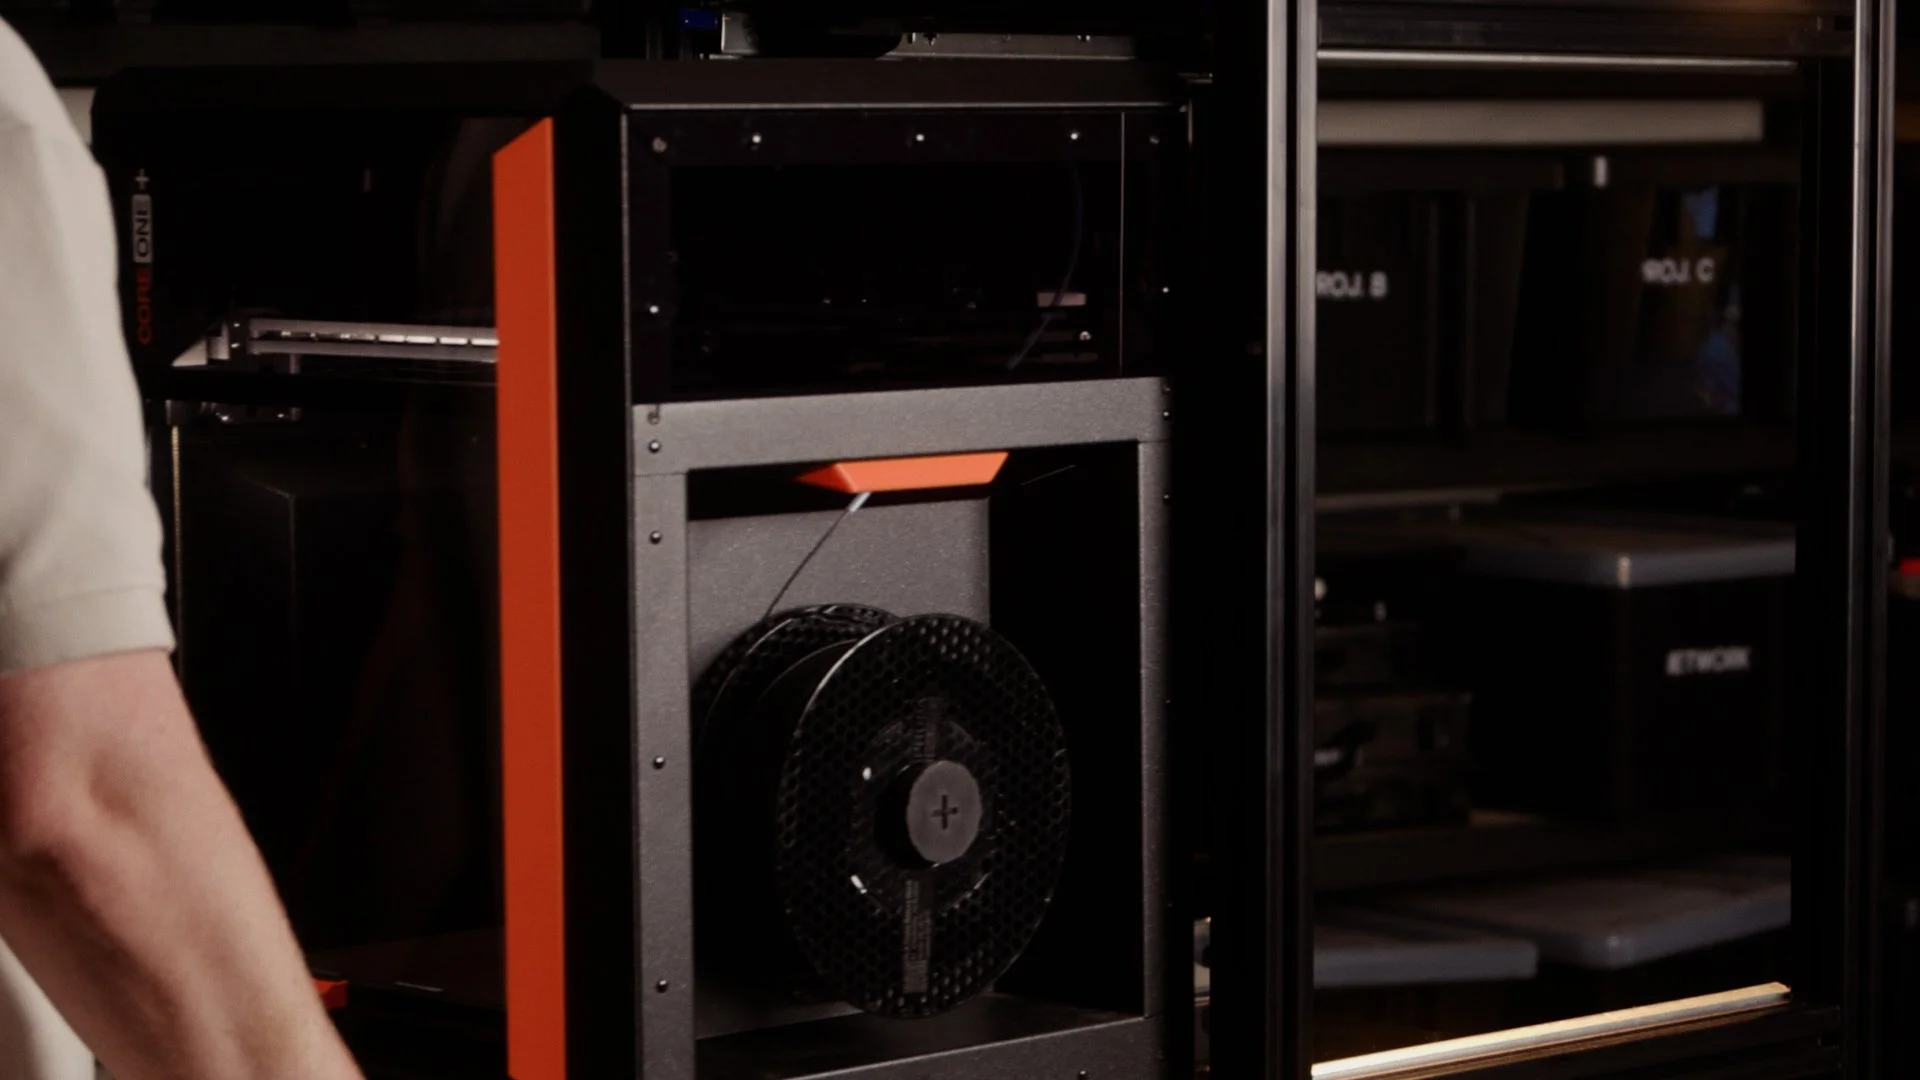
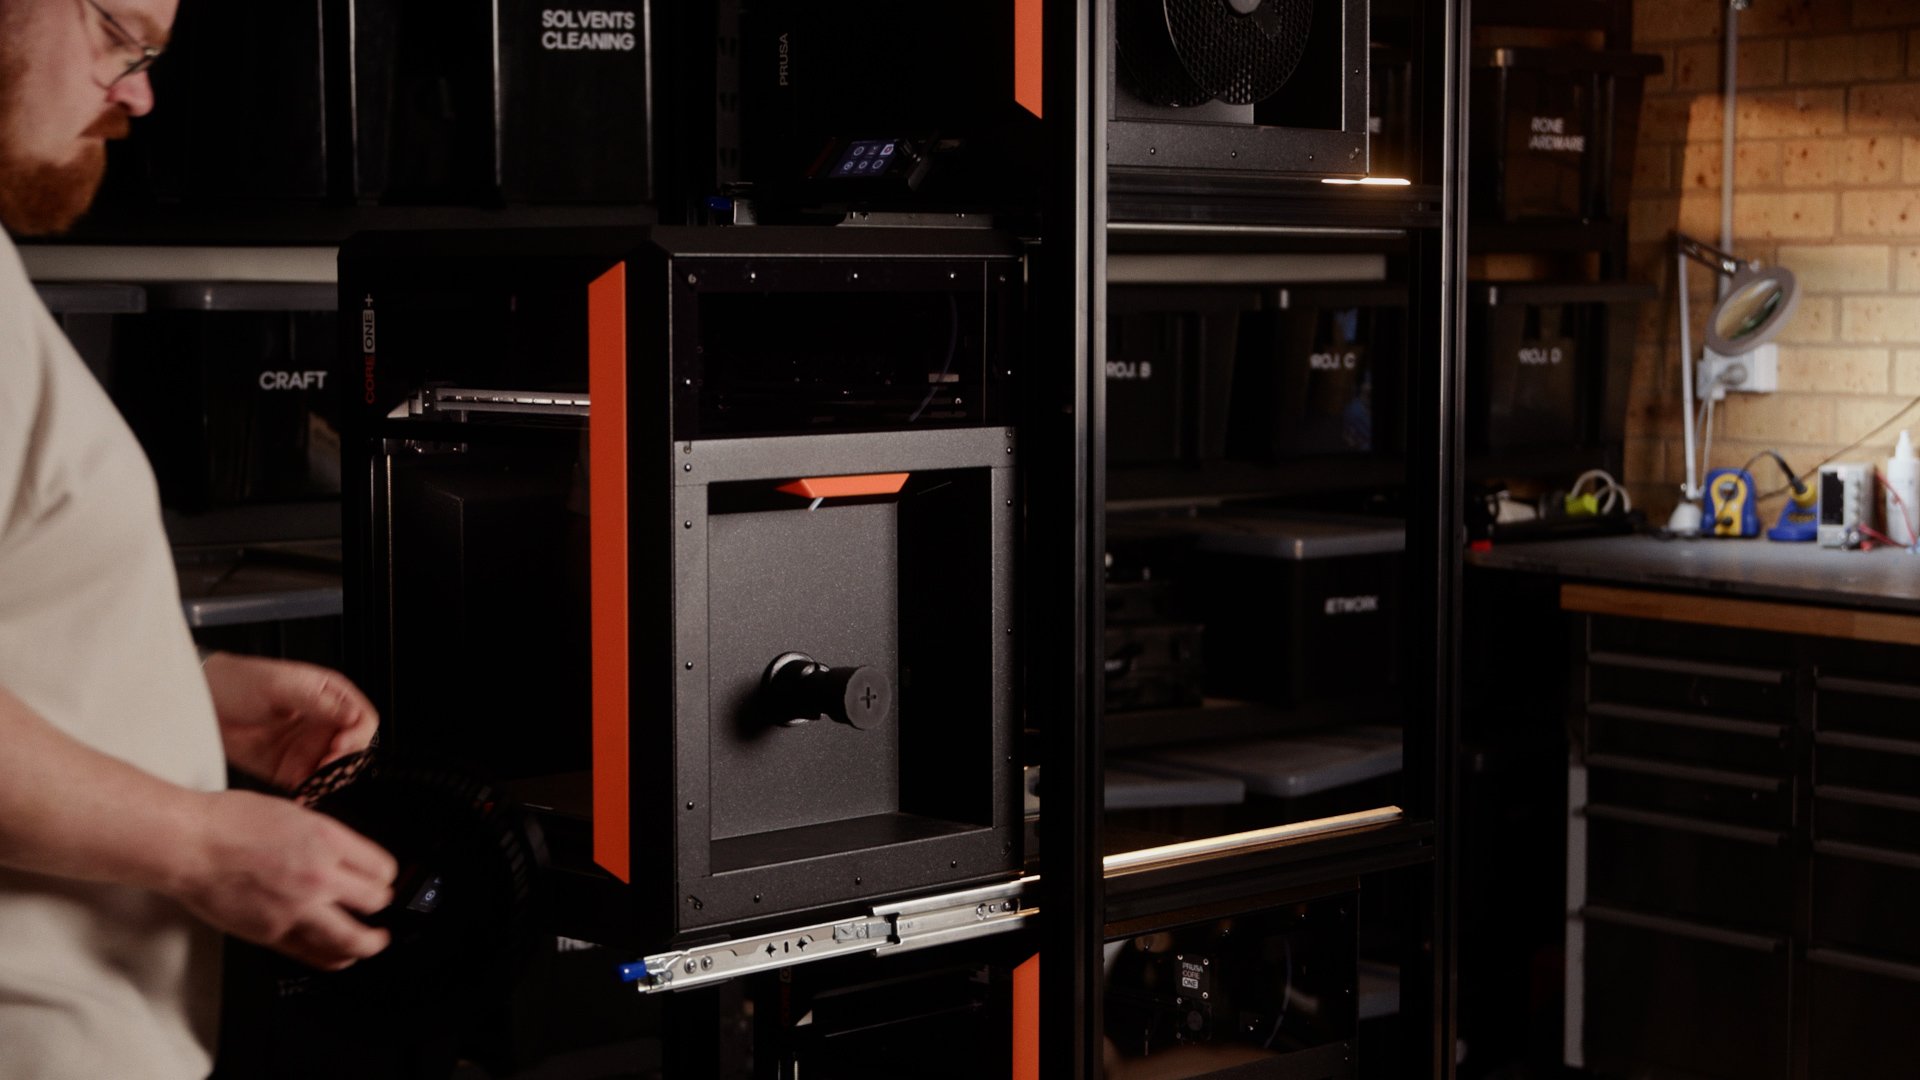
But stacking printers introduced another problem: filament access. The spool holder on the Core One sits on the right-hand side, which would normally be blocked by the frame or other shelving next to it.
To solve that, each printer sits on a pair of locking drawer slides. When I need to change filament, the whole printer simply slides out like a drawer. Once the filament is loaded, it slides back in and locks into place.
This makes maintenance much easier and also means the printers can sit extremely close together vertically.
Instead of using shelves, the printers are supported by a set of 3D printed mounting clips that hook directly onto the Core One’s steel frame. Four corner clips hold the printer in position, and additional centre clips wrap around the frame to prevent any movement.
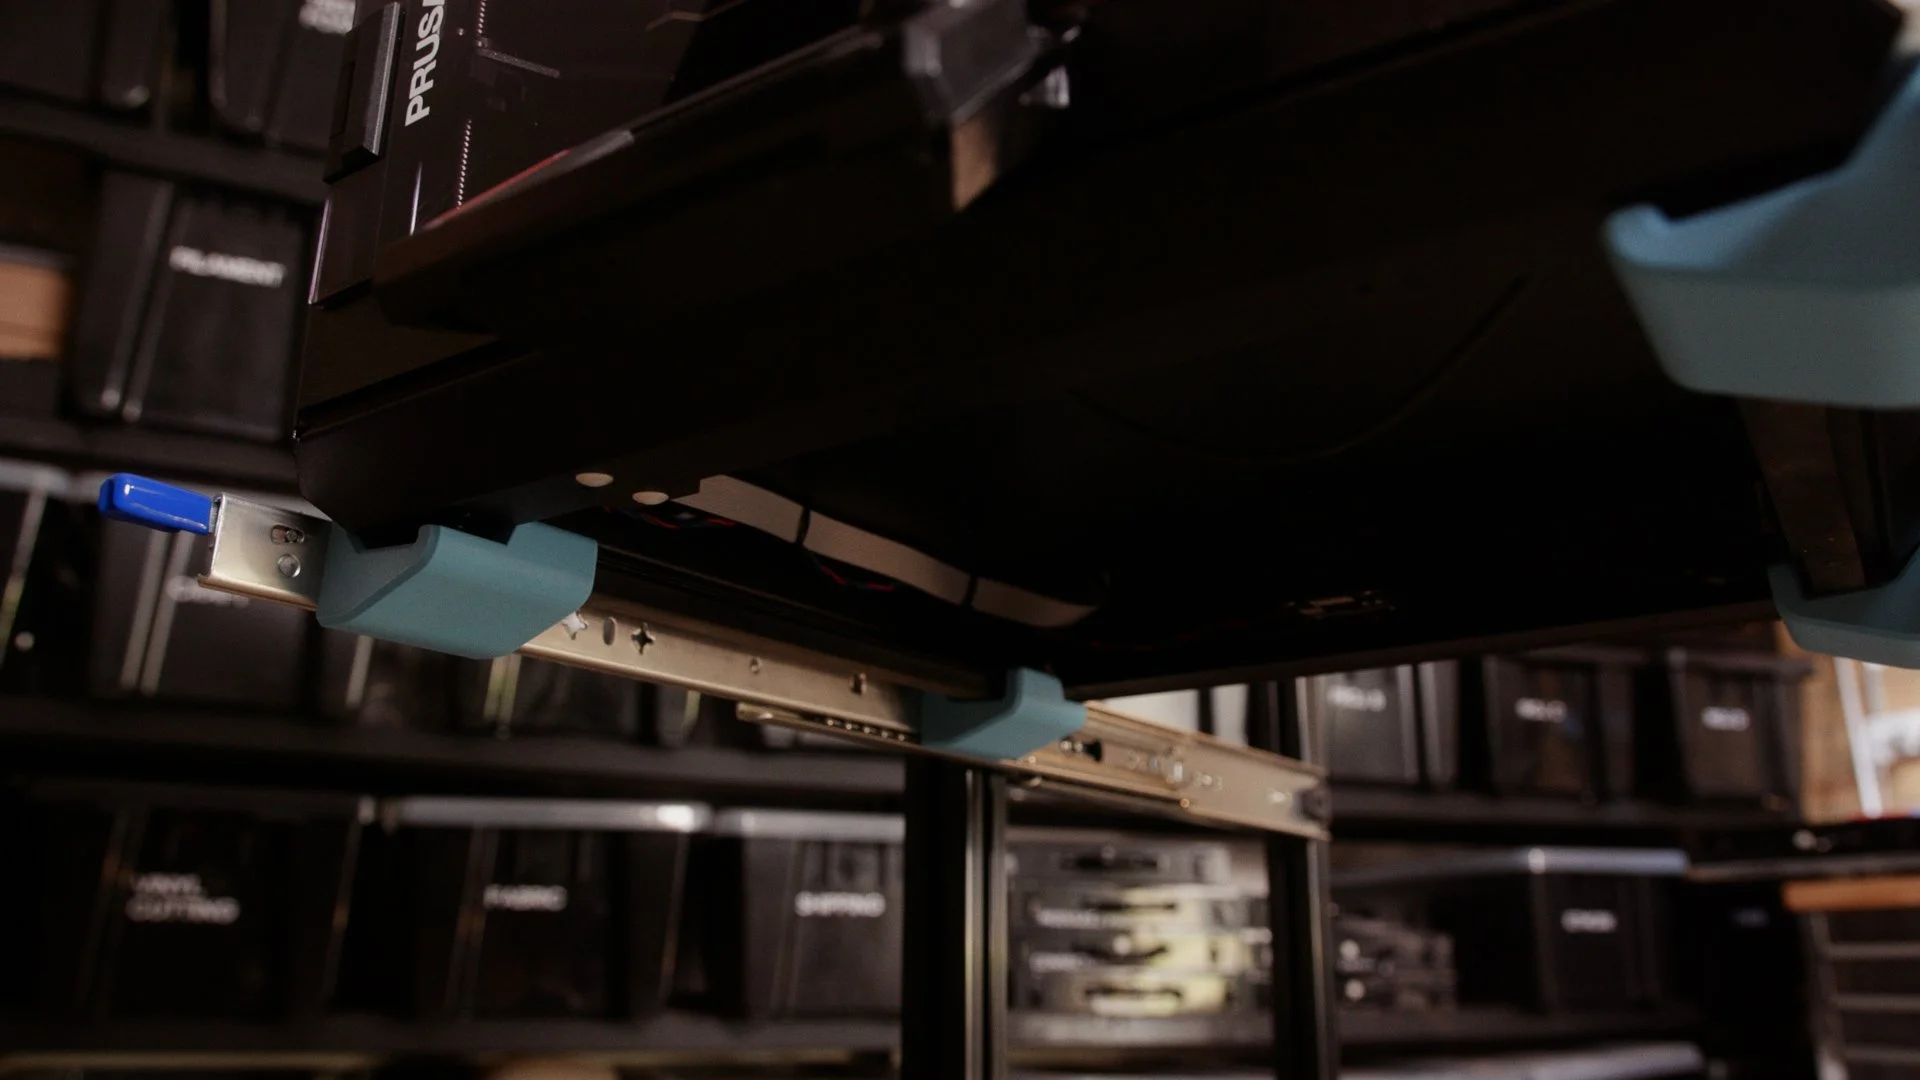
The prototype clips are seen here in blue
The final parts were printed in Prusament PC Blend, which is incredibly stiff and strong — perfect for supporting a ~20kg printer.
My Thoughts
Overall, I’m extremely happy with how this setup turned out.
The vertical layout saves a huge amount of space compared to my old trolley, and the drawer slides make accessing the printers far easier than I expected. Pulling the whole printer out to change filament feels a bit ridiculous at first, but it works brilliantly.
There were a couple of small issues along the way.
The slides had a bit of play in them, which caused some movement when the printers were pushed back in. That was easily solved with some small TPU bumpers that take up the slack and act as a soft stop.

Another issue was stability when a printer was pulled fully forward. The tower became a bit front-heavy, which wasn’t ideal.
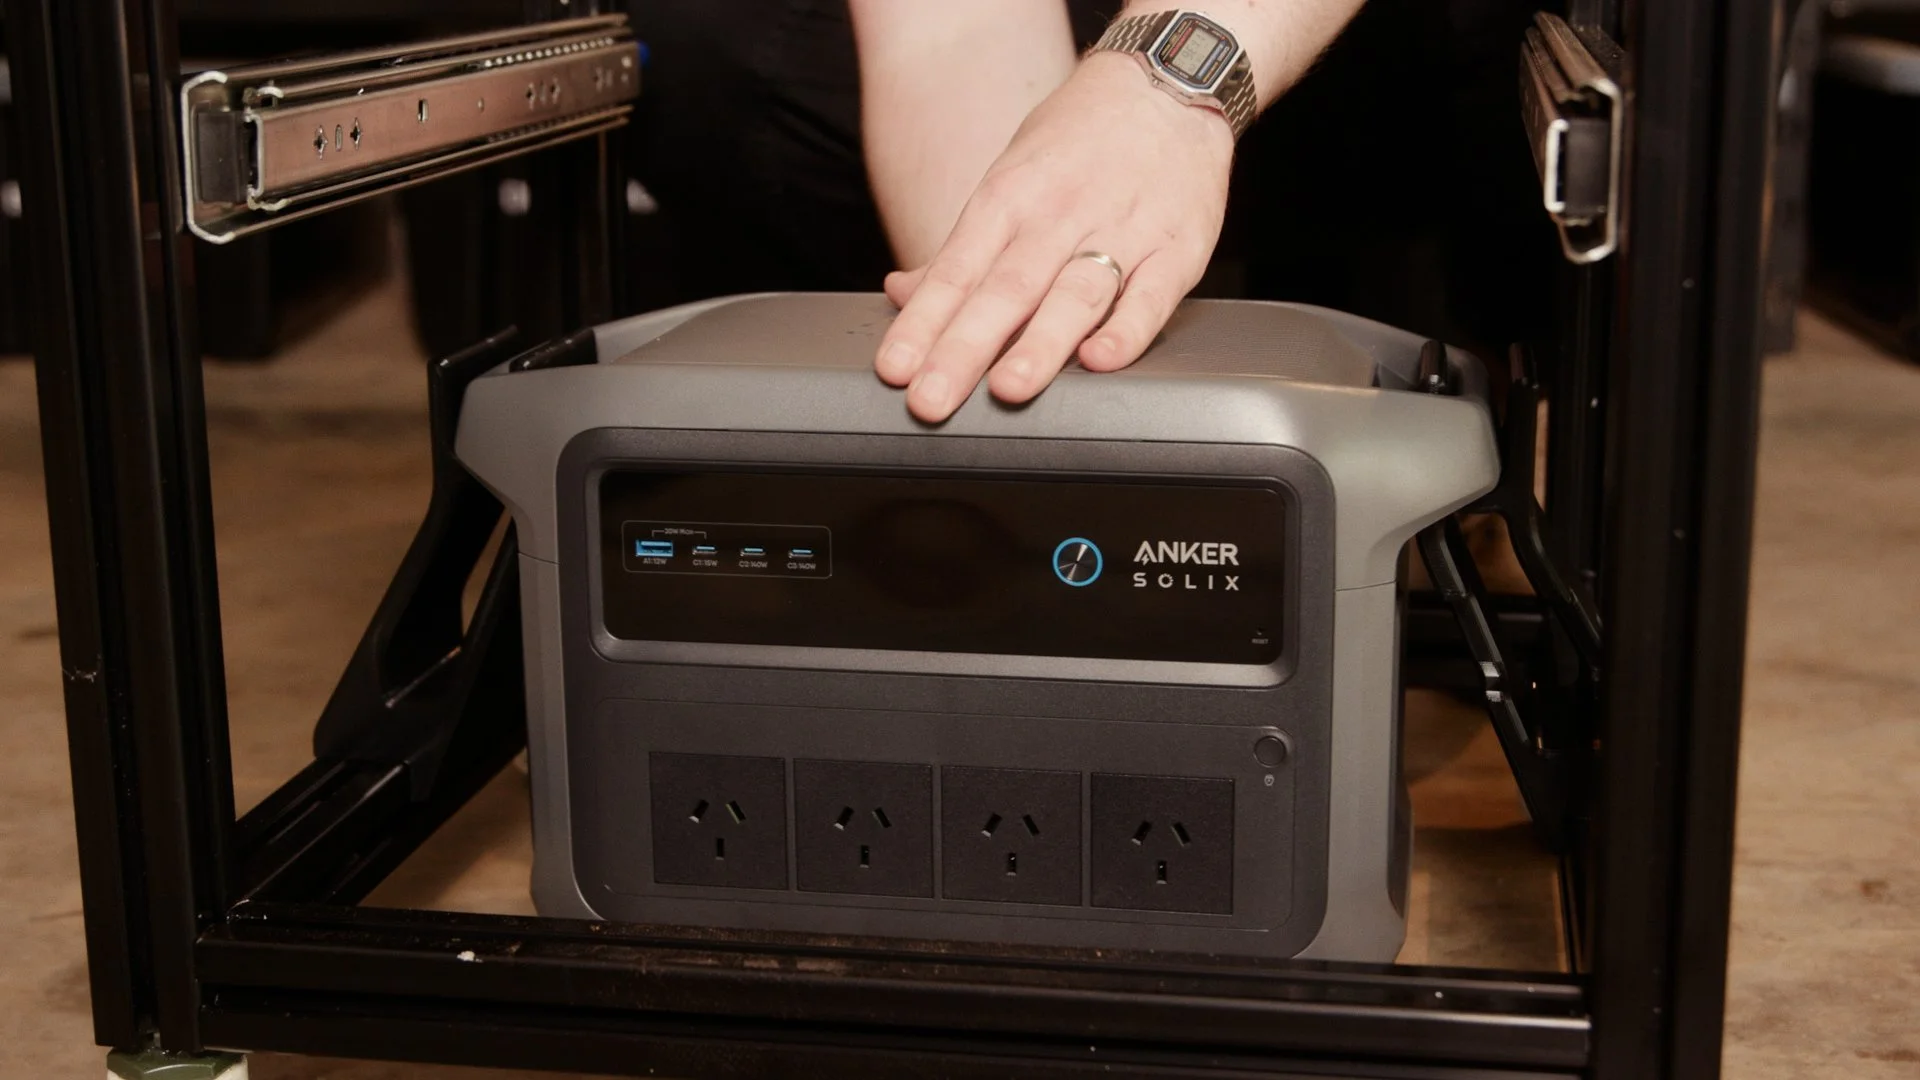
Conveniently, I had a good excuse to solve that problem by adding a portable power station to the base of the tower as a counterweight. Aside from improving stability, it also gives the printers UPS protection, meaning a short power outage won’t ruin a print.
After a week of using the setup to print our door sensor kits, the tower has been working flawlessly.
It’s compact, easy to work with, and significantly more practical than my old cart.
And if I decide to change the design later, the T-slot frame means I can reconfigure it without starting from scratch.
Build It Yourself
If you’d like to build something similar, the good news is that it’s actually a very approachable project. I’ve uploaded the .STEP files to Printables if you’d like to have a play with it!
The main structure is just 4040 aluminium extrusion, joined together with standard brackets and T-nuts. This makes the frame easy to assemble with basic tools and just as easy to modify later.
The custom parts in this build are the printer mounting clips and a few small accessories like bumpers and brackets. These are all designed specifically for the Prusa Core One, but the idea could easily be adapted for other printers.
One of the biggest advantages of building something like this yourself is that you can customise it endlessly. I’m already planning a few additions, including filament storage drawers, tool holders, and possibly a small filament drying station mounted to the side of the tower.
If you’d like to see the full build process, check out the video above.
And if you end up building your own printer tower — or improving on this design — I’d love to see what you come up with.