The Mega Tree | Christmas 2025 Part 3
Every year, we plan to have our family Christmas light show gets a little bigger, a little brighter, and a little more ambitious. Last year’s Mini Trees were a hit — but this time, I wanted something that would really take things to the next level. Literally.
This project? We’re going mega.
What Exactly Is a “Mega Tree”?
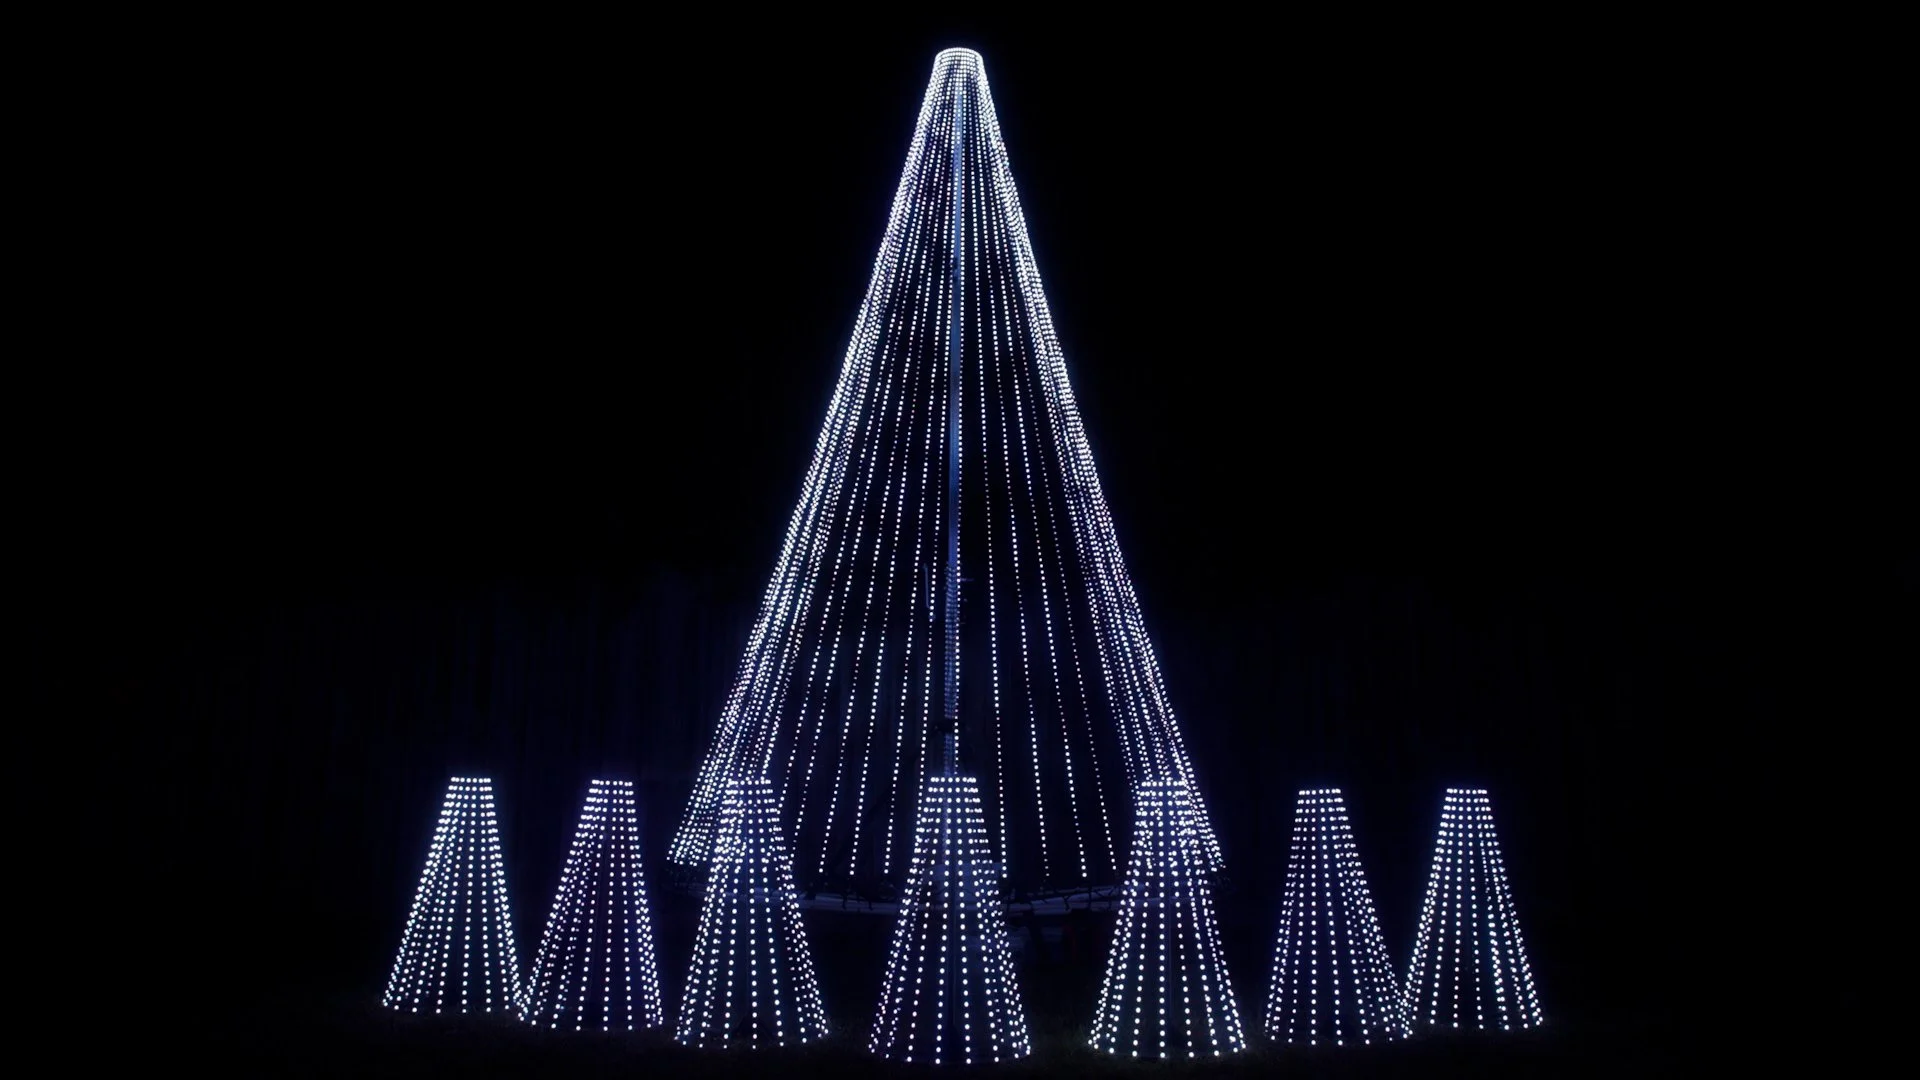
A Mega Tree is the showstopper in most large Christmas light displays, a towering, cone-shaped structure covered in RGB pixels, capable of dazzling effects and animations. In essence, it’s a giant version of our mini trees, designed to add height, movement, and that all-important wow factor.
Traditionally, these trees use heavy steel toppers and pixel mounting strips fitted with bullet pixels. They work well, but they’re also bulky, heavy, and difficult to store. I wanted a more lightweight approach — one that matched the rest of our seed-pixel-based display.
Our mini trees use 14 strings with 27 pixels each. For the Mega Tree, I wanted something much larger, but still manageable. Using a 3D model of my parents’ front yard, I experimented with different sizes until I landed on something that looked right:
Four metres tall with a 2.3-metre base, tall enough to sit above the house while keeping the driveway clear.
Design and Planning
As the tree grows taller, the base naturally widens, which can make the light strings spread too far apart and look sparse. To get the density right, I used a free calculator from LightShowHub.com to test different layouts.
The final design uses:
270° coverage (no lights on the back)
40 strings
166 pixels per string
25 mm spacing

That’s just under 7,000 individually addressable RGB pixels, pulling around 900 W of power at full brightness. Each controller port can handle about 800 pixels, so I’ll be running the tree across 10 ports in total. Complete overkill — exactly how I like it.
Building the Structure
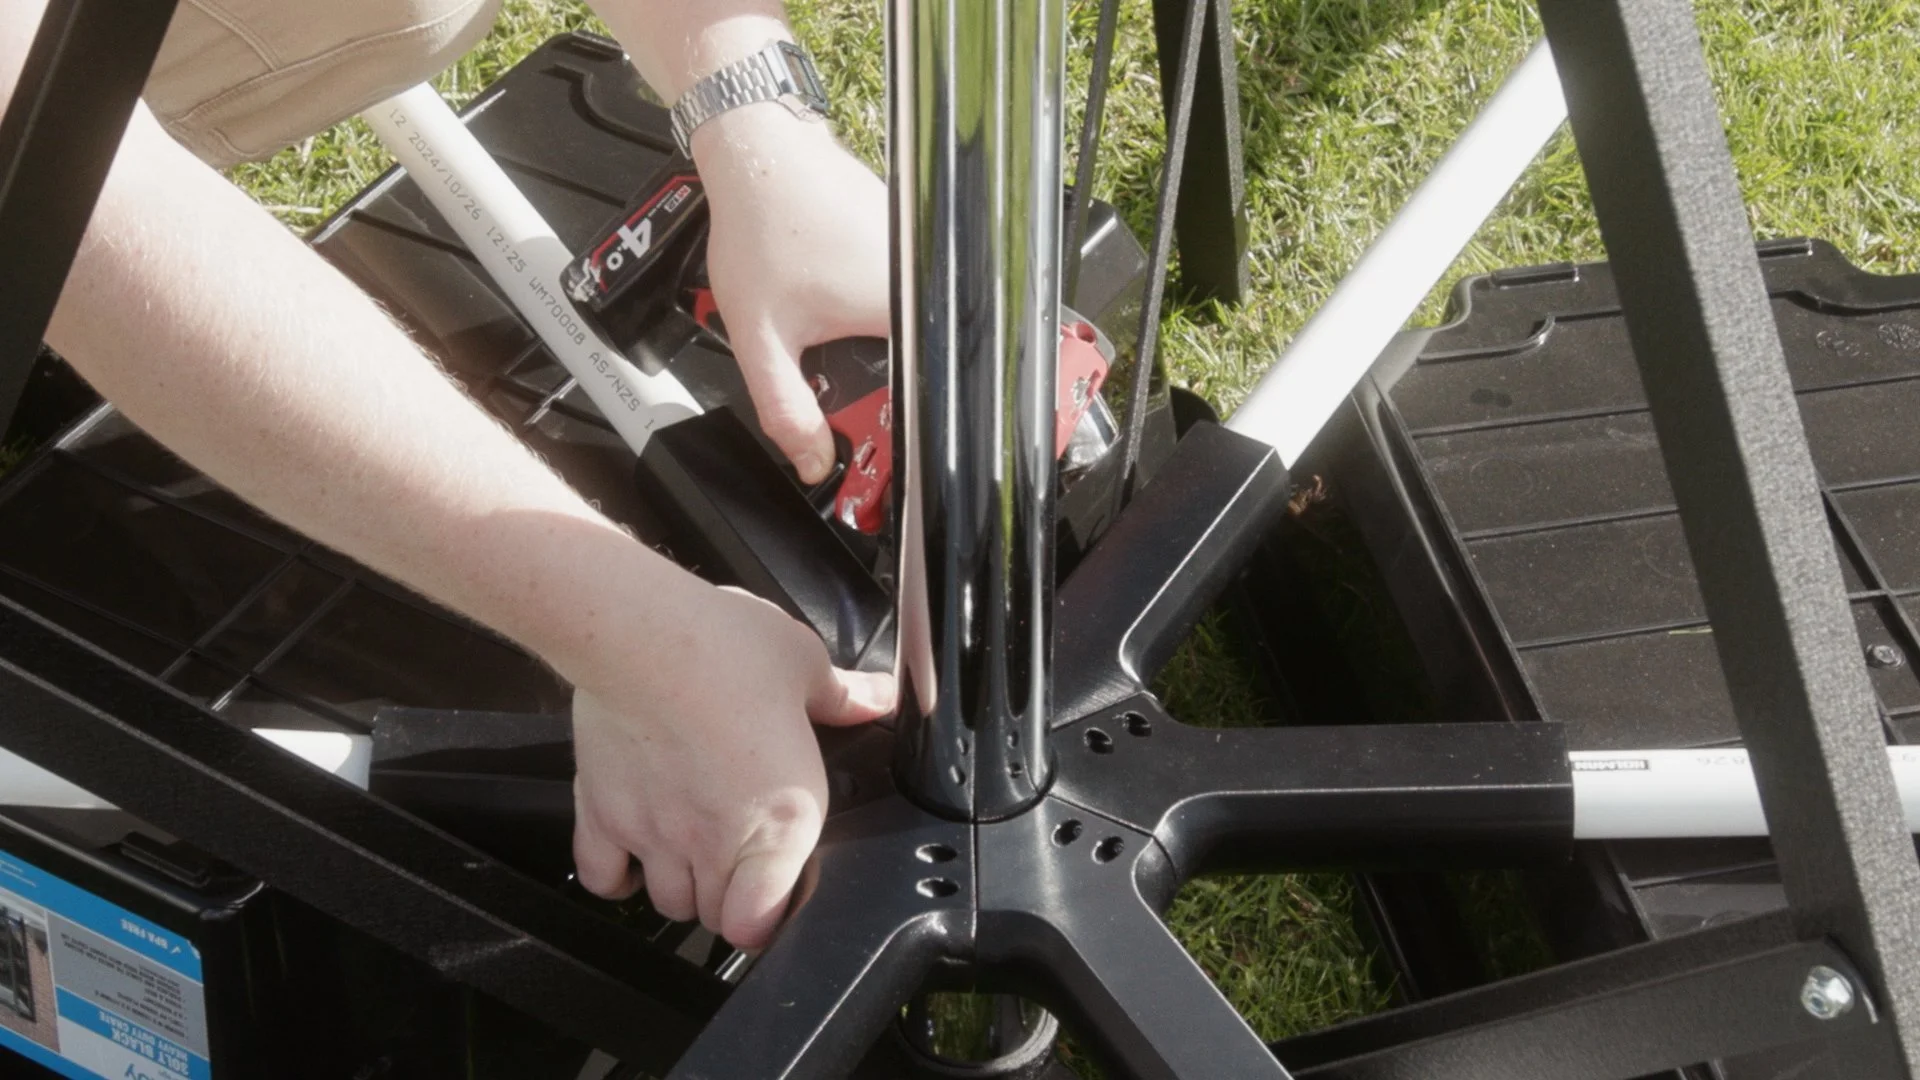
To support the tree, I needed something tall, strong, and affordable. After some searching, I found a 4-metre winch-up speaker stand — the kind used in live events for lighting trusses and PA speakers. It’s solid, adjustable, and rated for 85 kg of load. More than enough for what we need.

Still, I wanted extra stability for wind, so I designed a custom aluminium guy-wire clamp for the upper section and had it machined by PCBWay. This part clamps securely around the top of the stand and provides three anchor points for steel guy wires to keep the whole structure steady, even in bad weather.
Designing the Topper and Base
For the topper, I adapted our Mini Tree PCB design, scaling it up to handle 40 strings instead of 14. It includes pads for each LED string just like the mini trees.

The topper is also ‘wired’ a bit differently. There is a ground plane shared between the strings, but the +V line is only shared between neighbouring strings, to allow you to run as many power supplies as you need.
It’s a hell of a slog to wire up. It took me a few hours with a handful of breaks, but it came together. And I still think this is easier than the alternatives!
The base, however, needed a completely new approach. I designed a spoked wheel structure built from PVC conduit and 3D-printed joiners.
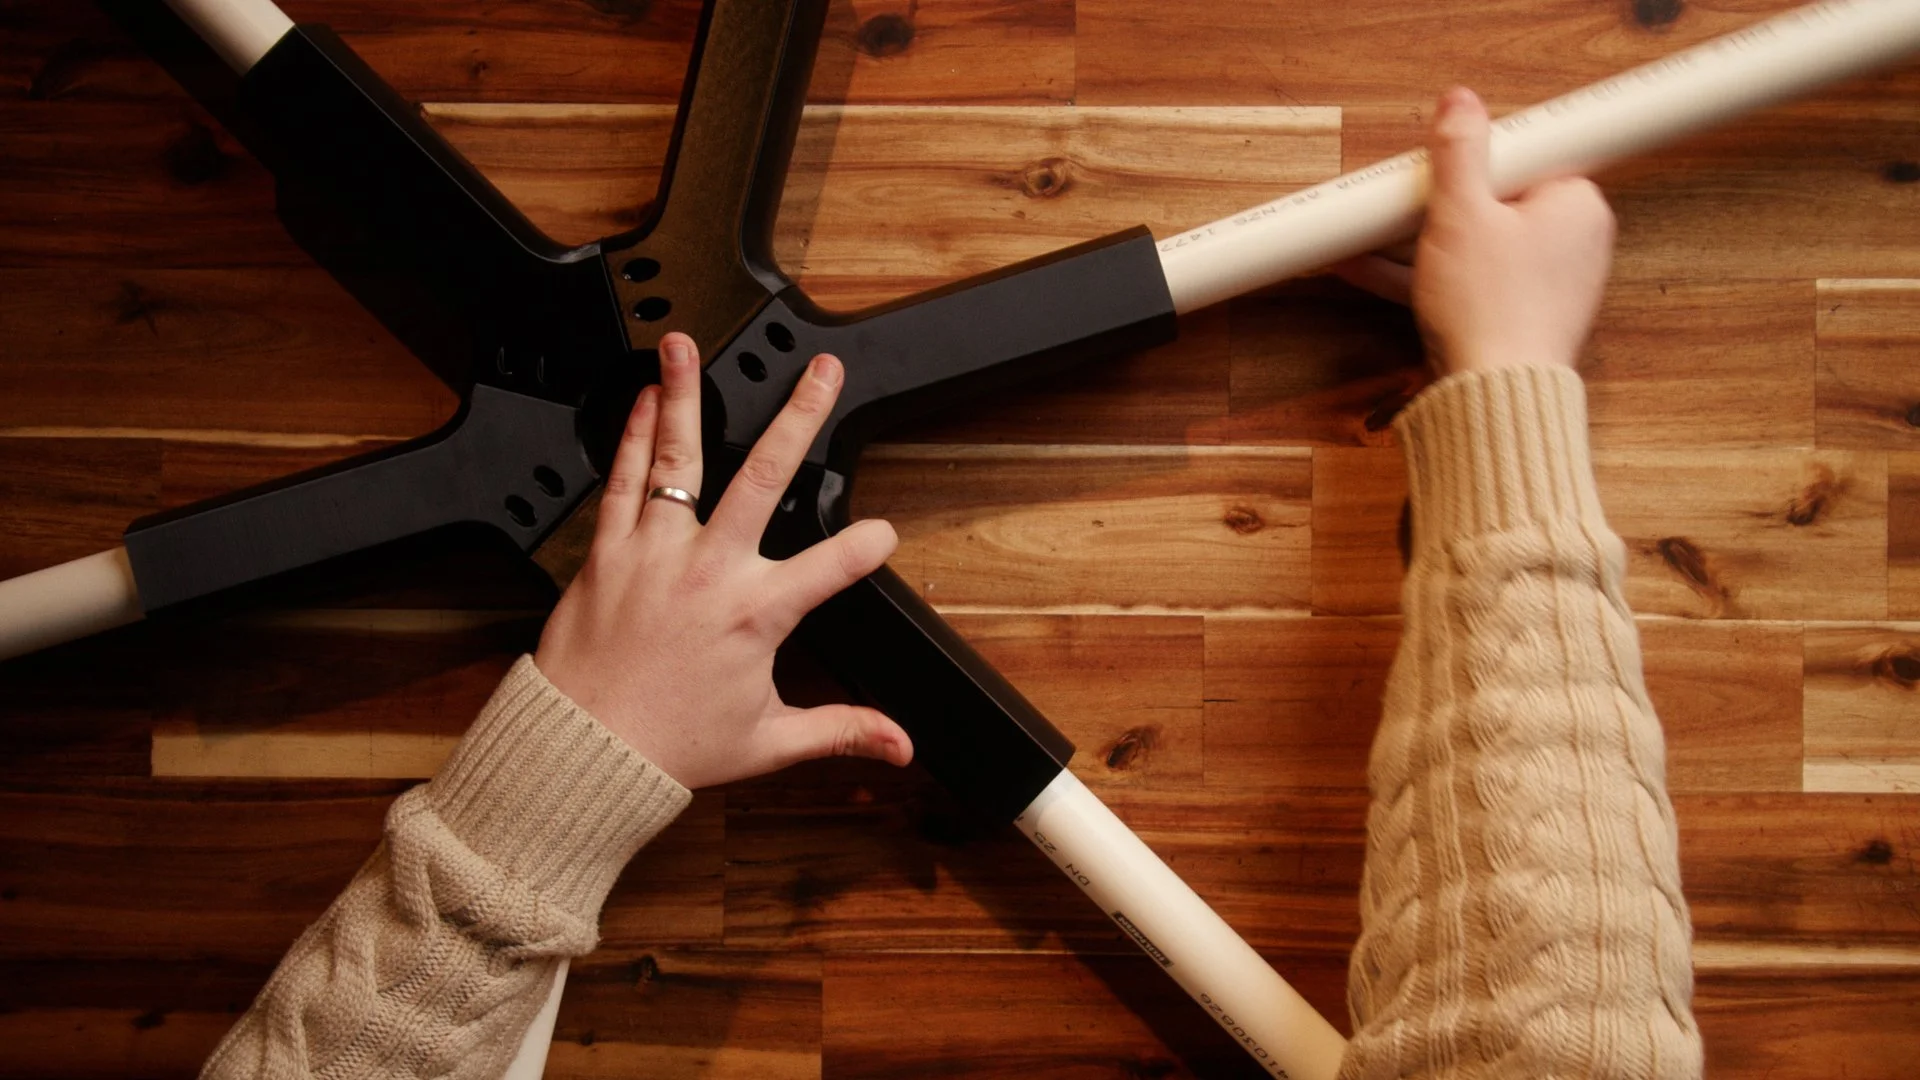
Each joiner is made from ASA filament, chosen for its UV stability and strength — perfect for surviving an Australian summer. All up, printing the parts took around 200 hours, but the result is a sturdy, modular base that can be disassembled for easy storage.
Simplifying Wiring and Storage
One of my biggest goals was to avoid endless wire-to-wire joins, so I created a set of small H-shaped PCBs for each pixel string. These provide pads for soldering, connection points for waterproof pigtails, and 12 mm holes for attaching Occy straps — short for “octopus straps,” if you’re not fluent in Australian slang.
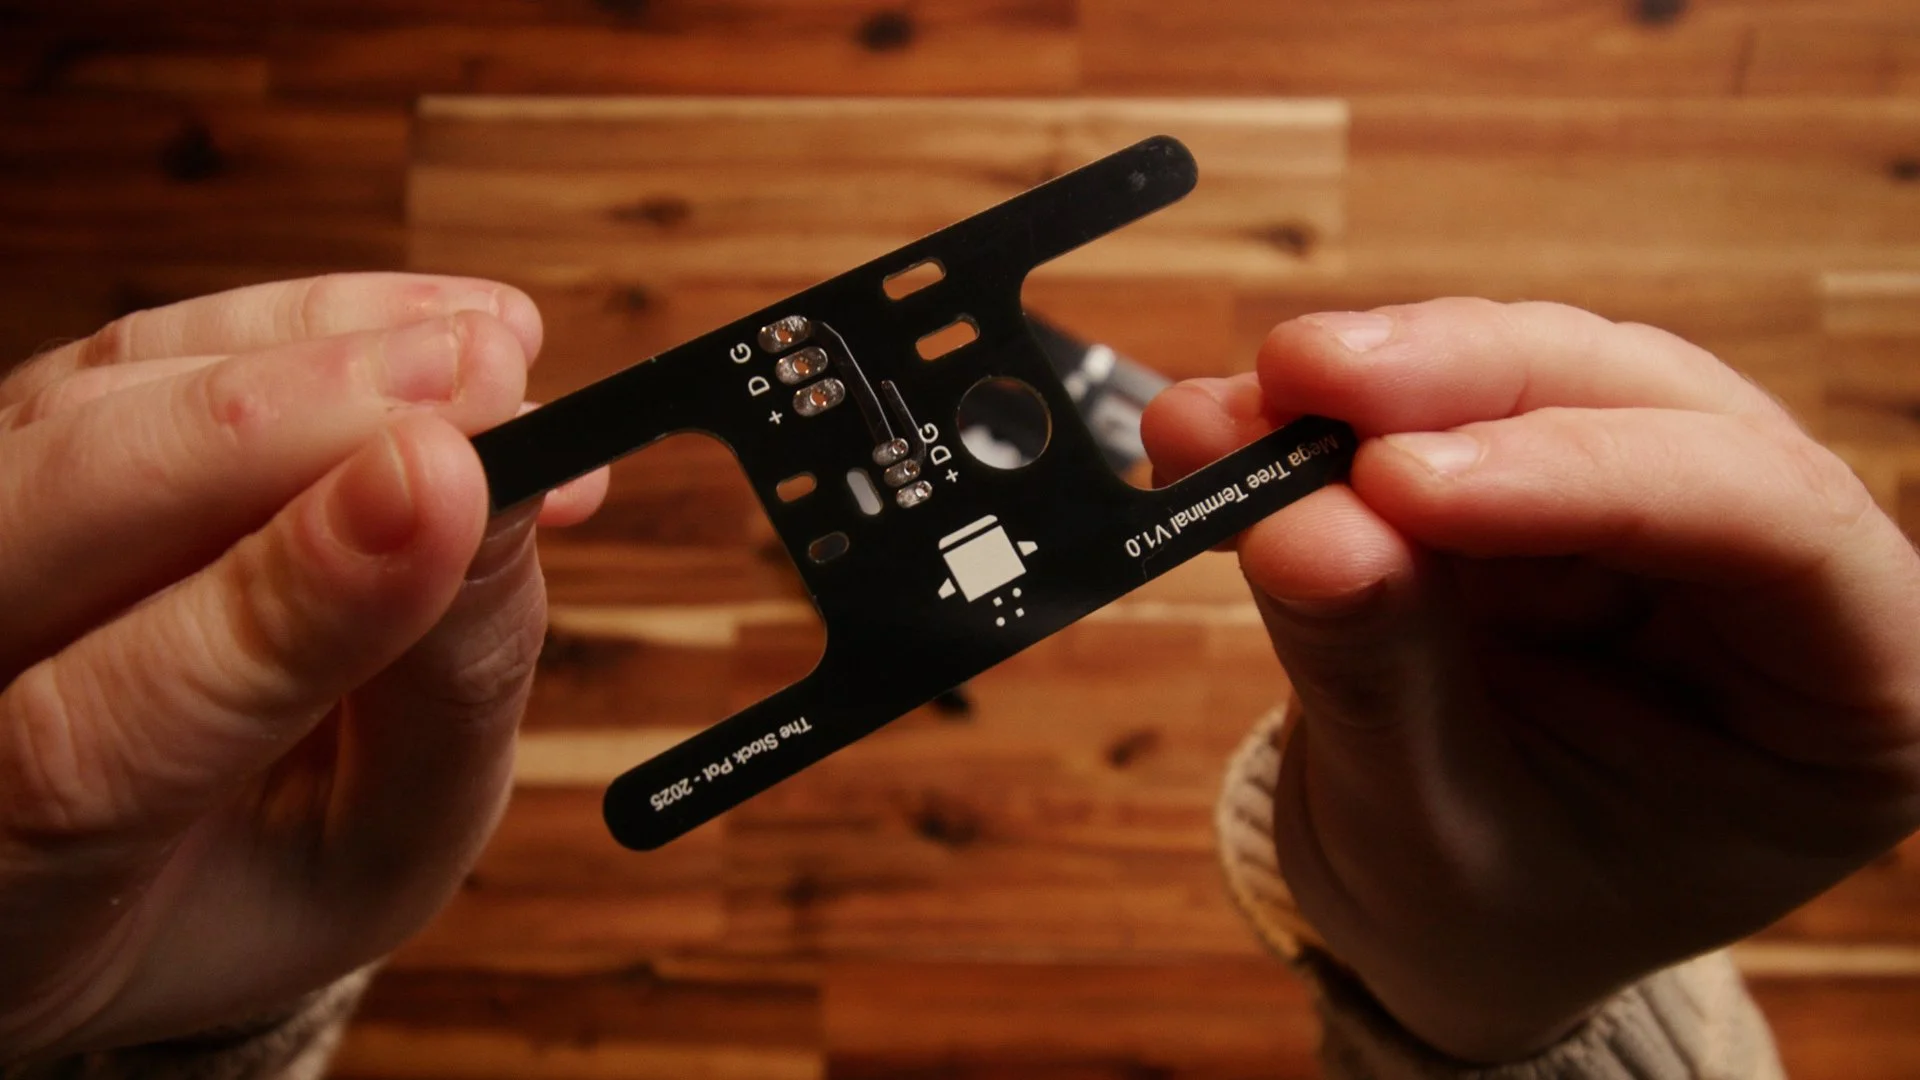
Each Occy strap hooks to the outer PVC ring, keeping the pixel strings under light, constant tension. The winch-up stand then lets me tweak that tension precisely once everything’s mounted.

Even better, these same boards double as storage reels at the end of the season. You can wind your pixel strings around them neatly and avoid the usual tangle nightmare next year.
Assembly and Testing
With all 40 pixel strings carefully measured and soldered, I waterproofed the joints with liquid electrical tape and began final assembly. The 3D-printed base bolted together cleanly, and the topper slid into place with a simple printed adapter.
Then came the satisfying part — attaching all 40 strings with the Occy straps, stepping back, and cranking the stand up for the very first time.
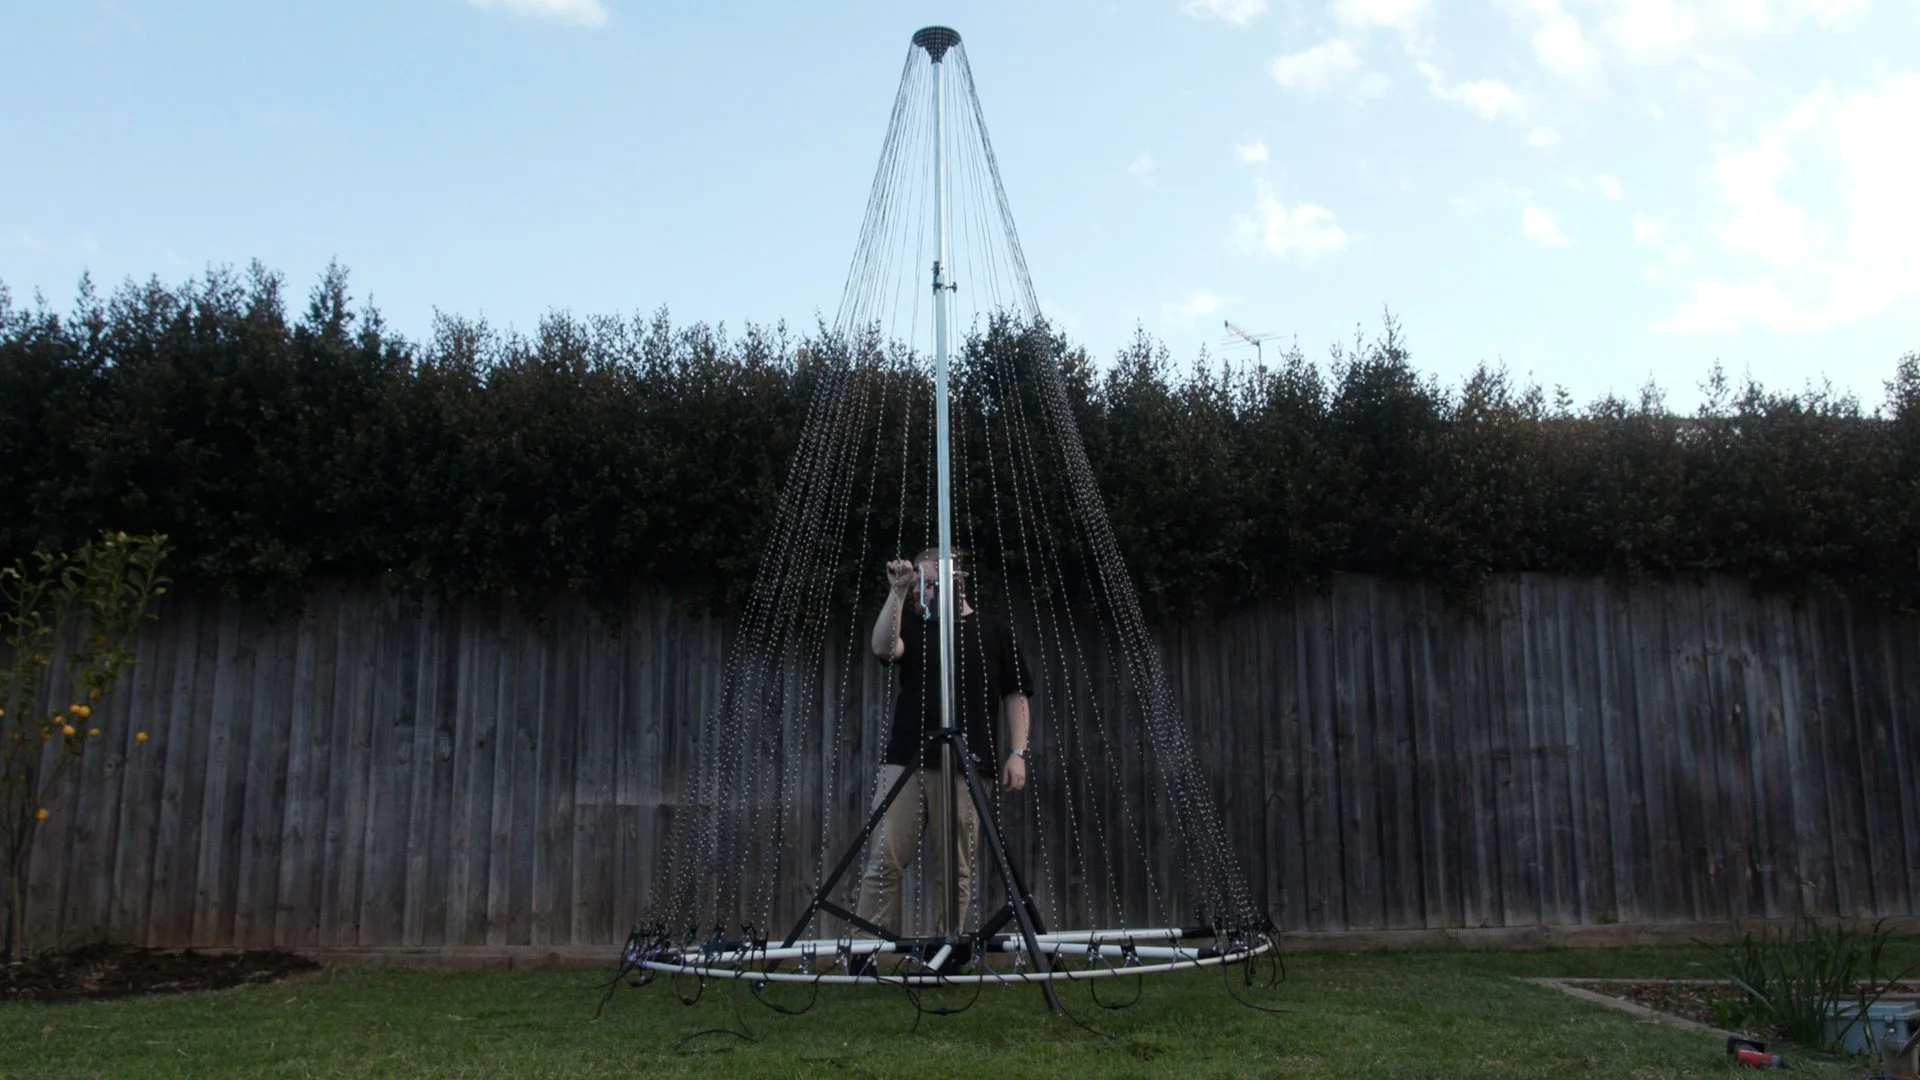
Seeing the Mega Tree rise to its full height was a surreal moment. It absolutely dominates the yard. Once powered on and connected to xLights and Falcon Player, it lit up brilliantly — far brighter than I’d expected. It’s safe to say this will be the centrepiece of our Christmas display for years to come.
Build Your Own Mega Tree
If you’d like to build your own Mega Tree (or even a smaller version), I’ve made the custom PCB designs available for pre-order through The Stock Pot Store.
You can also find a complete assembly tutorial on The Saucepan, where I cover wiring, soldering, and setup tips.
To replicate my tree exactly, you'll require
Topper + Terminal PCBs
1 x Speaker stand / Centre Post
Diameter of 60mm at the bottom
Diameter of 25mm at the top
Approx. 7000 12v seed pixels @ 25mm pitch
Cable ties for terminal boards
20 x Xconnect / RayWu pigtail pairs (20 male / 20 female)
6 x 1000mm 33.6mm OD PVC pipes
2 x 4000mm lengths of 25mm conduit (cut to length after assembly)
24 x M4 x 25mm screws to join hub components
8 x M4 x 12mm screws for attaching topper to PCB and securing topper to post
12 x Cable ties for attaching outer ring to joiners
Assembly is fairly self explanatory, if you have any questions, let me know in the comments of the video!
This build is large-scale, but absolutely doable with some planning and patience — and the results speak for themselves.
What’s Next
The Mega Tree adds the missing wow factor to our light show, and it’s just the beginning of this year’s upgrades. In the next video, I’ll be walking through the full setup process — installing the mini trees, programming the show, and fine-tuning our controllers and power setup.
If you’d like to follow along, subscribe on YouTube or check back here on The Stock Pot — there’s plenty more festive chaos to come.